Category Archives: Manuals

usas manual

Daewoo USAS-12 Shotgun: A Comprehensive Manual Overview

This manual details the Daewoo USAS-12 shotgun, offering insights into its operation, maintenance, and safety. Available online as PDF files,
it provides comprehensive guidance for users, covering various languages and versions.

Historical Context of the USAS-12

The Daewoo USAS-12 shotgun emerged in the late 1980s, developed by South Korea’s Daewoo Precision Industries. Initially designed for military and law enforcement applications, it aimed to provide a highly effective, automatic shotgun platform.
Documentation, like the May 1991 field manual, illustrates its early operational concepts. Though not widely adopted by US forces, it gained notoriety for its unique bullpup design and substantial firepower.

Its history reflects a period of innovation in automatic shotgun technology, though overshadowed by other systems.

Development and Purpose

Daewoo developed the USAS-12 to fulfill a need for a compact, automatic shotgun capable of high-volume fire. The bullpup configuration was central to its design, maximizing barrel length within a shorter overall package.
The primary purpose was close-quarters combat, breaching operations, and providing suppressive fire. Early manuals detail its intended role for military and police units.
It aimed to offer a significant firepower advantage over traditional pump-action shotguns, though its complexity presented challenges.

Key Features and Specifications

The USAS-12 boasts a fully automatic firing capability, achieving a rate of 300 rounds per minute. It utilizes a gas-operated, rotating bolt action and features a detachable box magazine holding eight shells.
The bullpup design contributes to its compact size, with an overall length of just 29.5 inches. Manuals specify a weight of approximately 11.3 pounds and a barrel length of 18.5 inches.
Its robust construction and high capacity defined its operational characteristics.

Understanding the USAS-12 Components

Detailed manuals illustrate the USAS-12’s receiver, action, barrel, gas system, stock, and forend. Understanding these parts is crucial for proper operation and maintenance.

Receiver and Action Assembly

The USAS-12’s receiver houses the critical action assembly, governing cycling and firing. Manuals detail disassembly for cleaning and repair, emphasizing proper reassembly procedures. Understanding the interaction between the bolt carrier group, trigger mechanism, and safety selector is paramount.

Careful attention to the receiver’s markings and serial number is advised. Proper function relies on correctly installed pins, springs, and detents. The action’s robust design facilitates rapid follow-up shots, but requires diligent maintenance as outlined in the provided documentation.

Barrel and Choke System

The USAS-12’s barrel is designed for versatility, accepting various choke tubes to modify shot patterns. Manuals illustrate choke installation and removal procedures, stressing the importance of correct tightening torque. Different chokes—cylinder, improved cylinder, modified, and full—impact range and spread.

Regular inspection of the barrel’s internal bore is crucial for identifying obstructions or damage. Proper cleaning prevents corrosion and maintains accuracy. Understanding choke selection optimizes performance for diverse applications, from close-quarters defense to longer-range targets.

Gas System Operation

The USAS-12 utilizes a long-stroke gas piston system, renowned for its reliability and ability to cycle reliably with various ammunition types. Manuals detail how gas is diverted from the barrel after firing, driving the piston rearward to unlock the bolt and eject spent casings.

Proper gas system maintenance, including cleaning and lubrication, is vital for consistent operation. Adjustments may be necessary based on ammunition weight; the manual provides guidance on regulating gas port settings for optimal cycling.

Stock and Forend Details

The USAS-12 features a synthetic stock and forend designed for durability and all-weather performance. Manuals illustrate the stock’s construction, highlighting its recoil-absorbing properties and ergonomic design for comfortable shooting.

Detailed diagrams showcase the forend’s attachment mechanism and potential for customization. Users should consult the manual for proper disassembly and reassembly procedures, ensuring a secure fit and safe operation of the shotgun.

Operating Procedures

The USAS-12 manual outlines safe loading, unloading, firing modes, and ammunition compatibility. Proper adherence to these procedures is crucial for responsible and effective operation.

Loading and Unloading Procedures

The Daewoo USAS-12 shotgun’s manual emphasizes meticulous attention during loading and unloading. Always ensure the firearm is pointed in a safe direction. Before loading, verify the chamber is empty. Insert shells firmly into the tubular magazine, utilizing the loading gate.
To unload, depress the magazine cutoff and remove shells individually or employ the action release for rapid unloading. Double-check the chamber and magazine to confirm complete removal of all ammunition, prioritizing safety at every step.

Safe Handling Guidelines

The USAS-12 manual stresses paramount safety practices. Always treat every firearm as if it’s loaded. Maintain control of the muzzle direction at all times, never pointing it at anything you don’t intend to shoot. Keep your finger off the trigger until ready to fire.
Be certain of your target and what’s beyond it. Regularly inspect the shotgun for malfunctions and adhere strictly to all local and federal firearm regulations.

Firing Modes Explained

The USAS-12 shotgun primarily operates as a semi-automatic weapon, delivering one shot per trigger pull. However, it’s uniquely capable of fully automatic fire, achieving a high rate of fire when the selector is set accordingly. The manual details proper technique for controlling the weapon during both modes. Users must understand the implications of full-auto and practice responsible fire discipline.

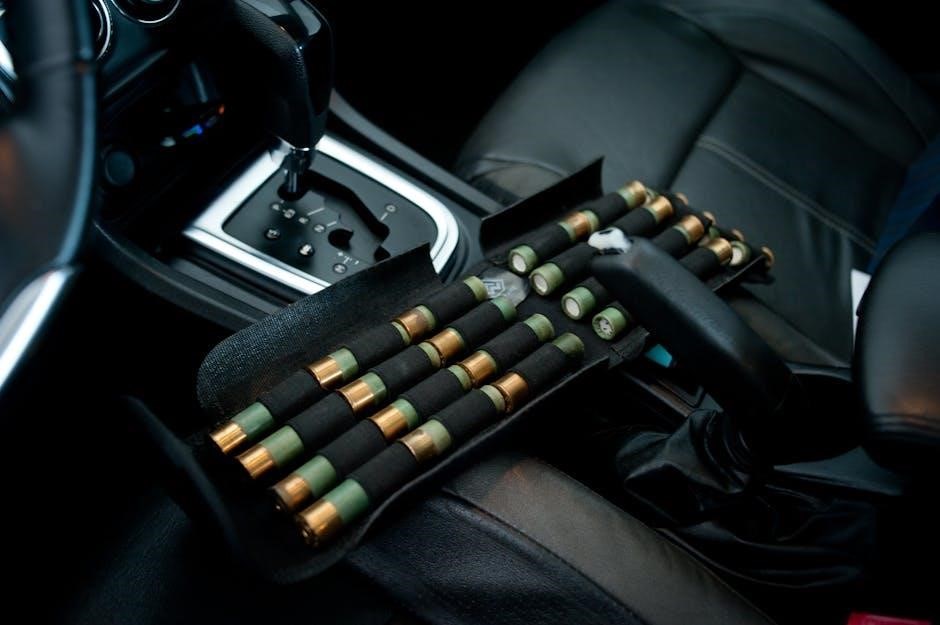
Ammunition Compatibility

The Daewoo USAS-12 is designed to function reliably with 12-gauge shotgun shells, specifically 2 ¾ inch and 3 ½ inch varieties. The manual stresses the importance of using quality ammunition to prevent malfunctions and ensure optimal performance. Avoid using damaged or reloaded shells. Utilizing incorrect ammunition can lead to damage or injury, so adherence to specified shell lengths is crucial for safe operation.

Maintenance and Cleaning

Regular disassembly, cleaning, and lubrication are vital for the USAS-12’s longevity and reliable function. The manual provides detailed instructions for these procedures.

Disassembly Instructions

The USAS-12 shotgun’s disassembly, as outlined in the available manuals, requires careful attention to detail for safe and effective maintenance. Begin by ensuring the firearm is unloaded and pointed in a safe direction. The manual guides users through removing the forend, followed by the bolt carrier group.

Detailed steps explain separating the gas piston and operating rod. Further instructions cover the receiver and trigger assembly, emphasizing proper sequencing to avoid damage. Diagrams within the PDF manuals visually aid this process, ensuring correct component removal and reassembly. Always consult the manual before attempting disassembly.

Cleaning Procedures for Key Components

The USAS-12 shotgun’s manual stresses regular cleaning to maintain optimal performance. Key components, like the bolt carrier group and gas piston, require thorough scrubbing with a suitable solvent to remove carbon buildup and residue.

The barrel should be cleaned using a bore brush and solvent, followed by a dry patch. Pay close attention to the gas system, ensuring all ports are clear of obstructions. The manual advises against abrasive cleaners, recommending gentle brushes and cloths for all parts. Proper cleaning extends the firearm’s lifespan.

Lubrication Recommendations

The Daewoo USAS-12 manual emphasizes proper lubrication for smooth operation and corrosion prevention. Apply a high-quality gun oil to the bolt carrier group, focusing on contact surfaces and rails. Lightly lubricate the gas piston and guide rod, ensuring free movement within the gas cylinder.

Avoid over-lubrication, as excess oil can attract dirt and debris. The manual suggests a light coating on the trigger mechanism and a wipe-down of external metal surfaces. Regular lubrication, combined with cleaning, ensures reliable functionality.

Inspection Checklist

Prior to each use, the USAS-12 manual recommends a thorough inspection. Check the barrel for obstructions and ensure the gas system is free of debris. Examine the receiver and action for any signs of damage or wear. Verify the security of all screws and pins, tightening if necessary.

Inspect the stock and forend for cracks or looseness. Confirm proper function of the trigger and safety mechanisms. A consistent inspection routine, as outlined in the manual, promotes safe and reliable operation.

Troubleshooting Common Issues

The USAS-12 manual addresses frequent problems like feeding and ejection malfunctions, gas system failures, and trigger concerns, offering solutions for reliable function.

Feeding Problems

Addressing feeding issues in the USAS-12 is crucial for consistent operation. The manual highlights potential causes, including ammunition compatibility and improper loading.
Ensure correct shell length and type are used, as the shotgun is sensitive to variations.
Inspect the magazine for damage or obstructions, and verify proper spring tension.
A dirty or poorly lubricated action can also hinder reliable feeding.
Thorough cleaning and lubrication, as detailed in the manual, are essential preventative measures.
Consistent malfunctions warrant professional inspection.

Ejection Issues

Consistent shell ejection is vital for safe and efficient USAS-12 operation. The manual addresses potential ejection failures, often stemming from a dirty or obstructed ejector port.
Accumulated debris can impede proper shell clearance. Inspect the ejector claw for damage or wear, as a compromised claw won’t reliably remove spent casings.
Ensure the gas system is functioning correctly, as insufficient cycling pressure can contribute to ejection problems. Regular cleaning and inspection are paramount.

Gas System Malfunctions

The USAS-12’s gas system is crucial for cycling the action; malfunctions severely impact reliability. The manual details troubleshooting steps for issues like insufficient gas pressure, often caused by carbon buildup or leaks.
Inspect the gas piston and cylinder for damage or excessive wear. Ensure the gas regulator is correctly adjusted for the ammunition type used.
A clogged gas port restricts gas flow, leading to failures. Thorough cleaning and proper lubrication are essential preventative measures.

Trigger Mechanism Concerns

The USAS-12’s trigger mechanism, while robust, can experience issues requiring attention. The manual addresses concerns like a gritty trigger pull, often stemming from a lack of lubrication or accumulated debris.
Inspect the sear and hammer for wear or damage, potentially causing unintentional discharges. A malfunctioning disconnector can lead to automatic fire.
Regular cleaning and professional inspection are vital for maintaining safe and reliable trigger function.

Advanced Usage and Modifications

The USAS-12 allows for choke selection and aftermarket parts. Experienced users can explore competition shooting, enhancing performance through customization and specialized accessories.

Choke Selection for Different Applications

Understanding choke functionality is crucial for maximizing the USAS-12’s versatility. Different chokes constrict the shot pattern, influencing range and spread. A more open choke is ideal for close-quarters engagements or birdshot, providing a wider spread. Conversely, tighter chokes are better suited for longer distances and larger shot sizes, concentrating the pattern for increased accuracy.

Selecting the appropriate choke depends on the intended use, whether it’s home defense, hunting, or competitive shooting. Experimentation with various chokes will reveal optimal performance for specific scenarios, enhancing the shotgun’s effectiveness.

Aftermarket Parts and Accessories

While the USAS-12 is a robust firearm, aftermarket support can enhance its functionality and customization. Limited information exists regarding extensive aftermarket parts specifically for this model, however, generic shotgun components may offer some compatibility.

Potential upgrades could include improved sights, ergonomic grips, or enhanced recoil reduction systems. Careful consideration is vital when selecting aftermarket parts, ensuring they maintain the firearm’s reliability and safety. Researching compatibility and quality is paramount before making any modifications.

Competition Shooting Considerations

The Daewoo USAS-12’s unique features present both advantages and challenges in competitive shooting scenarios. Its high capacity and semi-automatic action can be beneficial in fast-paced events, but recoil management is crucial for maintaining accuracy during rapid fire;

Competitors should focus on mastering quick reloads and practicing consistent trigger control. Choke selection, detailed elsewhere, plays a vital role in pattern control for different distances. Modifications should adhere to competition rules, prioritizing reliability and safe operation.

Safety Precautions

Always adhere to mandatory safety rules when handling the USAS-12. Prevent accidental discharge through proper storage, careful handling, and responsible transportation procedures.

Mandatory Safety Rules

Prior to any operation with the Daewoo USAS-12, a thorough understanding of its mechanics and safe handling procedures is paramount. Always treat every firearm as if it is loaded. Keep the muzzle pointed in a safe direction at all times.
Never place a finger on the trigger until ready to fire. Be certain of your target and what lies beyond it.
Regularly inspect the shotgun for any malfunctions or damage. Store ammunition separately from the firearm, in a locked and secure location, inaccessible to unauthorized individuals.

Accidental Discharge Prevention

Preventing accidental discharges with the USAS-12 requires diligent adherence to safety protocols. Always maintain control of the firearm, ensuring a firm grip and proper stance. Never override safety mechanisms or attempt modifications. Be mindful of the shotgun’s operating characteristics and potential for unexpected firing.
Regularly practice safe handling drills to reinforce proper techniques.
Inspect the chamber before loading, and verify the safety is engaged before handling.

Storage and Transportation Guidelines

Secure storage of the USAS-12 is paramount for safety and legal compliance. When storing, unload the shotgun completely and verify the chamber is empty. Utilize a locked gun safe or cabinet, inaccessible to unauthorized individuals, especially children. During transport, adhere to all applicable federal, state, and local regulations.
Ensure the firearm is unloaded and cased, separate from ammunition.
Always follow established protocols for legal transport.

Domoda Recipe Integration (Contextual Reference)

Domoda, a traditional Gambian peanut stew, showcases diverse culinary practices. Recipes utilize chicken, beef, or fish, highlighting adaptable cooking methods and rich flavor profiles.

Flavor Profile and Culinary Origins

Domoda’s flavor is deeply rooted in West African culinary traditions, particularly Gambian cuisine. The dish boasts a rich, savory, and slightly sweet profile, primarily derived from ground peanuts and ripe tomatoes. Variations exist, incorporating diverse proteins like chicken, lamb, beef, or fish, catering to regional preferences.

Its origins trace back to generations of home cooking, evolving into Gambia’s national dish. The stew’s comforting warmth and complex flavors reflect a history of resourceful cooking and communal dining, making it a beloved staple.

Ingredient Breakdown (Chicken, Peanuts, Tomatoes)

Domoda fundamentally relies on three core ingredients: chicken (or alternative protein), ground peanuts, and tomatoes. Chicken thighs are frequently used, providing rich flavor and tenderness. Ground peanuts form the base of the stew, lending its signature creamy texture and nutty taste. Ripe tomatoes contribute sweetness and acidity, balancing the dish.

Onions, garlic, and various vegetables enhance the complexity, while seasonings elevate the overall profile. The quality of these ingredients significantly impacts the final result, ensuring a flavorful and authentic Domoda experience.

Cooking Methods and Variations

Traditional Domoda involves sautéing onions, then browning the chosen protein (chicken, beef, fish) with garlic. Tomatoes are added, followed by ground peanuts and water, simmering until the protein is tender and the sauce thickens. Squash is often incorporated, cooking alongside for approximately 35-40 minutes.

Variations include using different proteins or omitting meat for a vegetarian option. Some recipes add vegetables like okra or peppers. The stew benefits from resting, with flavors intensifying overnight, making it even more delicious.

Technical Data Sheets

Detailed specifications, exploded diagrams, and comprehensive parts lists for the Daewoo USAS-12 shotgun are available in downloadable PDF manual formats.

Detailed Specifications Table

The USAS-12 shotgun’s technical data, as outlined in available manuals, includes its overall length, weight (both unloaded and loaded), barrel length, and chamber dimensions.
Key specifications also cover the operating system – a gas-operated, semi-automatic action – and magazine capacity, typically ranging from 8 to 20 rounds depending on the magazine type.
Further details encompass the type of ammunition compatible (primarily 12-gauge), and the materials used in its construction, ensuring durability and reliable performance.

Exploded View Diagrams

USAS-12 manuals frequently incorporate detailed exploded view diagrams, visually breaking down the shotgun’s complex assembly. These diagrams are invaluable for disassembly, maintenance, and parts identification;
They clearly illustrate the relationship between components like the receiver, barrel, gas system, trigger mechanism, and stock.
These visual guides aid in understanding the shotgun’s internal workings, facilitating repairs and ensuring correct reassembly after cleaning or component replacement.

Parts List

Comprehensive USAS-12 manuals include a detailed parts list, essential for ordering replacements or undertaking extensive repairs. This list meticulously catalogs each component, often accompanied by part numbers for accurate identification.
It covers everything from the receiver and barrel assembly to smaller items like springs, pins, and seals.
Having this list streamlines maintenance, ensuring users can readily source the correct parts, minimizing downtime and maximizing the shotgun’s operational lifespan.

Legal and Regulatory Information

Ownership of the USAS-12 is subject to federal, state, and local laws. Manuals emphasize compliance with licensing requirements and import/export restrictions.

Ownership and Licensing Requirements

Acquiring a Daewoo USAS-12 shotgun necessitates strict adherence to all applicable federal, state, and local firearms regulations. Potential owners must navigate a complex legal landscape, including background checks, waiting periods, and specific state-level restrictions.
Due to its classification, the USAS-12 may fall under National Firearms Act (NFA) regulations, demanding registration with the ATF and potentially requiring a tax stamp.
Consulting with legal counsel specializing in firearms law is strongly advised to ensure full compliance before attempting a purchase or transfer. Manuals often direct users to relevant legal resources.

Compliance Standards

The Daewoo USAS-12 shotgun, while historically produced, faces modern compliance challenges regarding current firearms regulations. Original manufacturing likely adhered to standards in effect during its production era. However, subsequent modifications or transfers must meet contemporary ATF guidelines.
Documentation, including the user manual, may reference past standards, but current owners are responsible for ensuring ongoing compliance.
This includes adherence to NFA rules if applicable, and state-specific laws governing features and capacity. Verification with legal experts is crucial.

Import/Export Restrictions

Due to the Daewoo USAS-12’s military origins and potential classification as a destructive device, import and export are heavily restricted. Current regulations prohibit or severely limit its movement across international borders without extensive licensing and approvals from both exporting and importing nations.
The ATF and State Department exert strict control.
Owners should verify current restrictions before attempting any transfer, as regulations frequently change. Violations carry significant penalties, including seizure and criminal prosecution.

Related Resources

Explore Daewoo firearms support websites and online forums for community insights. Training courses and readily available PDF manuals enhance USAS-12 knowledge.

Daewoo Firearms Support Website

Locating official Daewoo support resources is crucial for USAS-12 owners. While direct, dedicated websites appear limited based on current information, diligent searching may uncover archived materials or distributor support pages.
PDF versions of the user manual, like the 24-19 dated May 1991, are frequently shared across online firearm communities. These communities often serve as valuable hubs for information exchange, troubleshooting, and accessing documentation not readily available through official channels.
Regularly checking enthusiast forums can yield helpful insights and downloadable resources.

Online Forums and Communities

Dedicated online forums represent a significant resource for USAS-12 owners seeking information and support. These platforms frequently host downloadable manuals, including PDF versions like the “usa_field_manual_24-19_24-may-1991.pdf”. Users share experiences, troubleshooting tips, and modifications.
Active communities facilitate discussions on parts availability, maintenance procedures, and safe handling practices. Engaging with fellow enthusiasts can provide valuable insights beyond the scope of the official documentation, fostering a collaborative learning environment.

Training Courses and Workshops

While dedicated USAS-12 specific training appears limited, general shotgun safety and operation courses are highly recommended. Proficiency with any firearm necessitates formal instruction. These courses cover safe handling, loading/unloading procedures, and responsible ownership – principles applicable to the USAS-12.
Supplementing manual study with hands-on training enhances understanding and minimizes risk. Seek qualified instructors offering comprehensive firearm education, ensuring adherence to all legal and safety regulations.

dual pro battery charger manual

Dual Pro chargers are renowned for their reliability and advanced charging capabilities․ Accessing the manual is crucial for optimal performance and safety, ensuring longevity of your battery systems․

What are Dual Pro Battery Chargers?

Dual Pro battery chargers are sophisticated devices designed to efficiently and safely recharge various battery types, including lead-acid, AGM, and gel batteries․ They are widely utilized in recreational vehicles, marine applications, and automotive settings․ These chargers feature multiple charging banks, allowing simultaneous charging of different batteries․

The manual details specific models like the RS1, RS2, and RS3, highlighting their 6 and 18 amp outputs․ Understanding the charger’s capabilities, as outlined in the documentation, is vital for maximizing battery life and preventing damage․ Proper usage, guided by the manual, ensures optimal charging profiles․

Why Choose a Dual Pro Charger?

Dual Pro chargers offer several advantages, including advanced charging algorithms and robust construction․ The manual emphasizes features like temperature compensation and automatic voltage detection, enhancing battery performance and lifespan․ Multiple charging banks provide versatility, catering to diverse power needs․

Furthermore, Dual Pro prioritizes safety, with the manual detailing crucial precautions against electrical shock․ Accessing online or downloadable PDF manuals ensures users have readily available support․ Choosing Dual Pro means investing in a reliable, feature-rich charger backed by comprehensive documentation․

Understanding Your Dual Pro Charger Model

The manual details identifying your specific Dual Pro model number, crucial for accessing the correct charging profiles and features outlined in the documentation․

Identifying Your Specific Model Number

Locating your Dual Pro charger’s model number is the first step towards accessing the correct documentation․ This number, typically found on a label affixed to the charger’s casing, is essential for downloading the appropriate manual from the Dual Pro website (dualpro․com/support/product-manuals/)․

Common series include Recreation (RS1, RS2, RS3) and Professional models․ The manual provides tailored instructions based on your specific unit․ Accurate identification ensures you understand the unique features, charging profiles, and safety guidelines applicable to your charger, maximizing its performance and lifespan․ Without it, you risk improper operation․

Key Features and Specifications

Dual Pro chargers boast multi-bank charging, allowing simultaneous charging of multiple batteries․ Specifications, detailed in your manual, vary by model (RS1, RS2, RS3), but generally include amperage output (6, 12, or 18 amps) and voltage compatibility․

Advanced features like temperature compensation and automatic voltage detection optimize charging for different battery types․ The manual outlines these settings․ Understanding these specifications is vital for safe and efficient operation, preventing damage to your batteries and extending their lifespan․ Refer to your specific model’s documentation․

Safety Precautions

Always consult the manual before use! Proper grounding and polarity checks are essential to avoid electrical shock and potential battery damage, as outlined within;

Important Safety Warnings

Carefully review the Dual Pro charger manual for critical safety information․ Always connect the charger to a properly grounded outlet to minimize shock risk․ Before connecting to a battery, verify correct polarity – red to positive, black to negative – to prevent sparking and potential explosions․

Never charge damaged batteries․ Ensure adequate ventilation during charging, as batteries can release flammable gases․ Do not disassemble the charger; repairs should only be performed by qualified personnel․ Keep the charger dry and away from flammable materials․ Disconnect the charger before cleaning or inspecting connections․ Ignoring these warnings could result in serious injury or property damage․

Avoiding Electrical Shock

The Dual Pro charger manual emphasizes grounding as a primary safety measure․ Always utilize a properly grounded outlet; the manual notes EU style color coding – Brown (Line), Blue (Neutral), and Ground․ Inspect the AC line cord for damage before each use, replacing it if frayed or compromised․

Never operate the charger in wet or damp environments․ Avoid touching exposed terminals or connections while the charger is powered on․ Disconnect the charger from the power source before making any connections or disconnections to the battery․ Following these precautions significantly reduces the risk of electrical shock․

Setting Up Your Dual Pro Charger

Consult the manual for proper setup․ Connect to a grounded power source and carefully observe battery polarity – Red to Positive, Black to Negative – for safe operation․

Connecting to a Power Source

Crucially, before connecting your Dual Pro charger, always refer to the manual for specific instructions related to your model․ Ensure the power outlet is properly grounded to minimize the risk of electrical shock․ The manual details the AC line cord color coding – Brown for Line, Blue for Neutral, and Green/Yellow for Ground – adhering to EU standards․

Verify the voltage of the power source matches the charger’s input voltage requirements, as stated in the manual․ Using an incorrect voltage can damage the charger․ Always inspect the power cord for any signs of damage before use, and never operate the charger with a frayed or damaged cord․

Battery Polarity and Connection

Absolutely critical: always consult your Dual Pro charger manual before connecting to a battery․ Incorrect polarity can cause severe damage! The manual emphasizes identifying the positive (POS, P, +) and negative (NEG, N, -) terminals․ Typically, the positive post is larger in diameter․

Connect the red charger clip to the positive terminal and the black clip to the negative terminal․ Double-check these connections before powering on the charger․ A reversed connection can lead to battery explosion or fire․ The manual provides diagrams illustrating correct connection procedures for various battery types․

Charging Modes Explained

The manual details Standard, Boost, and Storage modes․ Standard charges normally, Boost quickly replenishes, and Storage prevents sulfation during inactivity – crucial for battery health․

Standard Charging Mode

Dual Pro’s Standard Charging Mode, as outlined in the manual, provides a consistent and reliable charge for maintaining optimal battery health․ This mode is ideal for routine charging when the battery isn’t deeply discharged․ It employs a multi-stage charging process, beginning with a bulk charge to quickly restore capacity, followed by absorption and float stages to top off the battery and maintain it at full charge without overcharging․

The manual emphasizes that this mode is suitable for daily use and helps prolong battery lifespan․ It’s a safe and efficient method for keeping batteries ready for use, ensuring consistent performance and preventing premature degradation․ Always consult your specific model’s manual for detailed settings․

Boost Charging Mode

The Dual Pro charger manual details Boost Charging Mode as a rapid recovery option for severely discharged batteries․ This mode delivers a higher current output, significantly reducing charging time when a battery is deeply depleted․ However, the manual cautions against prolonged use, as it can generate heat and potentially damage the battery if used excessively․

Boost mode is best reserved for emergencies or when a quick charge is essential․ The manual stresses monitoring the battery’s temperature during boost charging and switching to Standard Mode once a sufficient charge level is reached․ Refer to your specific model’s manual for recommended boost charging durations․

Storage Mode

According to the Dual Pro charger manual, Storage Mode is a vital function for maintaining battery health during periods of inactivity․ This mode applies a low, consistent charge that prevents sulfation – a common cause of battery degradation when left discharged for extended times․ The manual recommends utilizing Storage Mode when a battery won’t be used for several weeks or months․

The manual emphasizes that Storage Mode isn’t intended for regular charging; it’s a preservation technique․ It helps prolong battery lifespan and ensures it’s ready for use when needed․ Always consult your specific model’s manual for precise voltage settings within Storage Mode․

Using the Charger Interface

The Dual Pro charger manual details how to interpret LED indicators and navigate the control panel for efficient charging and monitoring of battery status․

Understanding the LED Indicators

Dual Pro battery charger manuals emphasize the importance of understanding the LED indicators․ These lights provide crucial information about the charging process and battery status․ A solid green light typically indicates a fully charged battery, while a flashing green light signifies charging is in progress․

Red LEDs often signal a problem, such as reverse polarity or a faulty battery․ Amber lights may indicate a storage mode or temperature-related issue․ Refer to your specific model’s manual for a detailed breakdown of each LED’s meaning, ensuring proper diagnosis and operation․ Ignoring these signals could lead to battery damage or reduced charger performance․

Navigating the Control Panel

The Dual Pro battery charger manual details the control panel’s functions, varying slightly by model․ Generally, you’ll find buttons for selecting charging modes – standard, boost, and storage – each optimized for different battery conditions․ Some models feature temperature compensation settings, crucial for maintaining optimal charging in extreme climates․

The manual illustrates how to adjust voltage levels and amperage, ensuring compatibility with various battery types․ Familiarize yourself with the panel’s layout before operation, referencing the diagrams provided․ Incorrect settings can damage batteries; therefore, careful review of the manual is essential․

Troubleshooting Common Issues

The Dual Pro manual provides solutions for issues like the charger not powering on or batteries failing to charge, including error code explanations․

Charger Not Turning On

If your Dual Pro charger fails to power on, consult the manual first․ Verify the AC power cord is securely connected to both the charger and a properly grounded outlet․ Double-check the outlet’s functionality with another device․

The manual emphasizes checking the fuse within the charger; a blown fuse is a common cause․ Inspect the battery connections – ensure they are clean and firmly attached, as poor connections can prevent operation․ Refer to the manual’s troubleshooting section for specific model guidance and potential internal issues requiring professional attention․

Battery Not Charging

If the Dual Pro charger appears active but the battery isn’t charging, the manual advises verifying correct battery polarity․ Incorrect connections – positive to negative – will prevent charging and could damage the system․ Ensure the charger’s selected charging mode aligns with your battery type, as detailed in the manual․

Check for corroded or loose battery terminals․ A failing battery itself can also be the issue; the manual suggests testing the battery’s voltage․ If problems persist, consult the manual’s troubleshooting guide for error codes or contact Dual Pro support․

Error Codes and Their Meanings

The Dual Pro charger’s manual details specific error codes displayed via LED indicators․ These codes signal potential issues, ranging from reversed polarity to over-voltage or a faulty battery․ The manual provides a comprehensive list, explaining each code’s meaning and recommended corrective actions․

For example, a flashing red light might indicate a reversed polarity connection, requiring immediate attention․ Referencing the manual’s error code section is crucial for accurate diagnosis and preventing further damage․ Ignoring error codes can lead to battery failure or charger malfunction․

Maintaining Your Dual Pro Charger

The Dual Pro manual emphasizes regular cleaning and cable inspection․ Proper maintenance, as outlined, ensures optimal performance and extends the charger’s lifespan considerably․

Cleaning and Storage

Dual Pro’s manual recommends periodic cleaning to remove dirt and debris, ensuring efficient operation․ Disconnect the charger from the power source before cleaning․ Use a damp cloth – avoid harsh chemicals or solvents․ Inspect cables for damage; replace if frayed or cracked․

For storage, keep the charger in a cool, dry environment, protected from extreme temperatures and humidity․ Coiling the cables neatly prevents damage․ Review the manual for specific long-term storage guidelines to maintain optimal functionality and prolong the charger’s life․ Proper storage safeguards against corrosion and potential malfunctions․

Inspecting Cables and Connections

The Dual Pro manual emphasizes regular inspection of cables and connections for safe and effective charging․ Before each use, check for fraying, cracking, or corrosion on both the AC power cord and the DC battery cables․ Ensure connections are tight and secure, preventing voltage drops and potential overheating․

Loose or damaged connections can lead to inefficient charging or even pose a safety hazard․ Replace any damaged cables immediately․ The manual details proper connection procedures, highlighting the importance of correct polarity to avoid battery damage or charger malfunction․

Dual Pro Charger Manual Resources

Dual Pro provides comprehensive manual resources online, including downloadable PDFs, for all charger models․ These guides offer detailed instructions and troubleshooting tips․

Accessing Online Manuals

Dual Pro offers a dedicated support section on their website – dualpro․com/support/product-manuals – where users can easily find digital versions of their charger manuals․ This online resource allows for quick access to information without the need for downloads or physical copies․

The website’s search function enables users to locate the specific manual for their model by entering the model number․ These online manuals cover a wide range of Dual Pro chargers, including the Recreation Series (RS1, RS2, RS3) and other advanced models․

Users can view the manuals directly in their web browser, making it convenient to consult the documentation while setting up or troubleshooting their charger․ This digital accessibility ensures that users always have the latest information at their fingertips․

Downloading PDF Manuals

For offline access and portability, Dual Pro provides downloadable PDF versions of all their charger manuals through their official support website․ Visiting dualpro․com/support/product-manuals allows users to select and download the manual corresponding to their specific charger model – like the RS3, RS2, or RS1․

These PDF manuals retain the complete information found in the online versions, including detailed instructions on setup, operation, safety precautions, and troubleshooting․ Downloading the manual ensures access even without an internet connection, ideal for use in remote locations․

Saving the PDF to a mobile device or computer provides a convenient and readily available resource for quick reference during charger maintenance or operation․

Specific Model Series ‒ Recreation Series (RS)

The Recreation Series (RS1, RS2, RS3) manuals detail charging profiles tailored for recreational batteries, offering specific guidance for optimal performance and longevity․

RS1, RS2, and RS3 Comparison

Dual Pro’s Recreation Series – RS1, RS2, and RS3 – offers varying amperage outputs to suit different battery bank sizes․ The manual highlights that the RS1 typically provides 6 amps, ideal for smaller setups․ The RS2 expands to 12 amps, accommodating medium-sized battery systems․

The RS3, the most powerful of the three, delivers up to 18 amps, suitable for larger recreational or marine applications․ Each model’s manual details specific charging profiles and safety features․ Understanding these differences, as outlined in the respective manuals, is vital for selecting the appropriate charger for your needs and ensuring optimal battery health․

Recreation Series Charging Profiles

The Dual Pro Recreation Series manual details several charging profiles optimized for various battery types․ These include standard charging for flooded lead-acid, AGM, and gel batteries․ Boost charging provides a faster charge for depleted batteries, as explained in the manual․

Storage mode, crucial for long-term battery health, maintains optimal voltage levels during inactivity․ The manual emphasizes selecting the correct profile based on your battery chemistry․ Incorrect settings can reduce battery lifespan or even cause damage․ Refer to your specific model’s manual for detailed instructions․

Advanced Charging Features

The Dual Pro manual highlights temperature compensation and automatic voltage detection, optimizing charging for varying conditions and battery types, enhancing performance․

Temperature Compensation

Dual Pro chargers, as detailed in the manual, incorporate temperature compensation to adjust the charging voltage based on battery temperature․ This feature is vital because batteries charge more efficiently at specific temperatures․

Cold temperatures require a higher charging voltage, while warmer temperatures necessitate a lower voltage to prevent overcharging and potential damage․ The manual explains how the charger senses battery temperature and automatically modifies the charging process accordingly․ This ensures optimal battery health, extends battery lifespan, and maximizes charging efficiency, regardless of the ambient environment․ Proper temperature compensation is key to safe and effective charging․

Automatic Voltage Detection

The Dual Pro charger manual highlights its automatic voltage detection feature, a significant convenience for users․ This intelligent system automatically identifies the battery’s voltage – typically 6V, 12V, or 24V – upon connection․

Eliminating the need for manual voltage selection minimizes the risk of incorrect settings and potential damage to the battery or charger․ The manual emphasizes that this feature streamlines the charging process, making it user-friendly for both novice and experienced users․ Accurate voltage detection ensures the battery receives the correct charge, optimizing performance and longevity․

Warranty Information

Dual Pro offers warranty coverage detailed in the manual, protecting against manufacturing defects․ Review the terms for claim procedures and duration for peace of mind․

Dual Pro Warranty Coverage

Dual Pro battery chargers are backed by a limited warranty, the specifics of which are thoroughly outlined within your product’s manual․ Generally, this warranty safeguards against defects in materials and workmanship under normal use․ The duration varies by model, so consulting the manual is essential․

Coverage typically excludes damage resulting from misuse, accidents, improper installation, or unauthorized modifications․ To initiate a claim, retain your proof of purchase and carefully follow the instructions detailed in the manual․ Proper documentation and adherence to the outlined procedures are vital for a successful warranty resolution․

How to File a Warranty Claim

To initiate a Dual Pro warranty claim, first, carefully review the warranty details within your charger’s manual․ Gather your original proof of purchase – a receipt or invoice – as this is essential․ Contact Dual Pro customer support, details found in the manual, to obtain a Return Merchandise Authorization (RMA) number․

Properly package the charger, including all accessories, and clearly mark the RMA number on the outside of the box․ Ship the unit to the address provided by Dual Pro․ The manual may offer specific shipping instructions; follow them closely to avoid delays․

Customer Support and Contact Information

Dual Pro’s website offers extensive support resources, including downloadable manuals and a dedicated support portal for troubleshooting and assistance with your charger․

Dual Pro Website and Support Portal

Dual Pro’s official website, dualpro․com, serves as a central hub for all customer support needs․ A dedicated “Support” section provides direct access to a comprehensive library of product manuals, including those for specific models like the RS1, RS2, and RS3․

Users can easily navigate to find the correct manual by model number, ensuring they have the most up-to-date information․ The support portal also features frequently asked questions (FAQs), troubleshooting guides, and helpful videos demonstrating proper charger operation and maintenance․

Furthermore, the website offers a contact form for submitting inquiries directly to the Dual Pro customer service team, facilitating personalized assistance when needed․

Contacting Customer Service

For personalized assistance regarding your Dual Pro battery charger or its manual, direct contact with their customer service team is recommended․ While specific contact details aren’t explicitly provided in the sourced information, the Dual Pro website (dualpro․com) is the primary point of contact․

Look for a “Contact Us” or “Support” section on their website to find email addresses, phone numbers, or a contact form․ When reaching out, have your charger’s model number readily available to expedite the support process․

Clearly describe your issue or question related to the manual or charger operation for efficient resolution․

fluke 179 user manual

Fluke 179 User Manual: A Comprehensive Guide

Fluke leads in electronic testing‚ offering portable‚ safe‚ and user-friendly tools like the 179․ This guide details its features‚ operation‚ and maintenance procedures․

The Fluke 179 is a highly regarded digital multimeter‚ celebrated for its robustness‚ accuracy‚ and comprehensive feature set․ It’s a staple for professional electricians‚ HVAC technicians‚ and anyone requiring dependable electrical measurements․ Originating from a lineage of quality Fluke instruments – building upon the success of models like the Fluke 87 – the 179 offers enhanced capabilities for modern troubleshooting․

This manual provides a detailed exploration of the Fluke 179‚ covering everything from initial setup and operation to advanced functions and safety precautions․ Understanding its capabilities ensures optimal performance and longevity․ Fluke Corporation’s commitment to quality is evident in this tool‚ designed for demanding field conditions and precise diagnostics․

Key Features and Specifications

The Fluke 179 boasts a wide range of features‚ including accurate voltage and current measurement (AC/DC)‚ resistance‚ continuity‚ diode testing‚ and frequency measurement․ It features Auto Volt selection‚ automatically choosing the correct voltage range․ Min/Max/Average recording captures transient events‚ while the Hold function freezes readings for convenient viewing․

Key specifications include a 600V CAT III safety rating‚ ensuring user protection in various electrical environments․ It offers a 20‚000-count display resolution for precise readings․ The meter is known for its durability and reliable performance‚ reflecting Fluke’s industry leadership in test tools and software․ It’s designed for portability and ease of use in demanding professional settings․

Getting Started with Your Fluke 179

Begin by inspecting the meter‚ installing batteries correctly‚ and familiarizing yourself with the display and controls for optimal performance and safe operation․

Unboxing and Initial Inspection

Carefully unpack your Fluke 179 digital multimeter and verify all components are present․ The package should include the meter itself‚ test leads (typically red‚ black‚ and alligator clips)‚ a 9V battery‚ and this user manual․ Inspect the meter for any visible damage sustained during shipping‚ such as cracks in the casing or a damaged display․

Check the test leads for insulation breaks or damaged connectors․ Ensure the battery compartment is secure and shows no signs of corrosion․ If any damage is detected‚ do not use the meter and contact Fluke support or your point of purchase immediately․ Retain the original packaging for potential future transport or warranty claims․ A thorough initial inspection ensures safe and accurate operation from the start․

Battery Installation and Replacement

To install the 9V battery‚ locate the battery compartment on the rear of the Fluke 179․ Gently slide the compartment cover open․ Observe the polarity markings (+ and -) inside the compartment and insert a fresh 9V alkaline battery accordingly․ Ensure the battery snaps securely into place․ To replace the battery‚ repeat this process‚ always using a new‚ high-quality 9V battery․

A low battery is indicated by a battery icon on the display․ Replace the battery promptly when this icon appears to maintain accurate measurements․ Do not mix old and new batteries‚ or different types of batteries․ Dispose of used batteries responsibly according to local regulations․

Understanding the Display and Controls

The Fluke 179 features a large‚ easy-to-read digital display․ It shows the measured value‚ units‚ and various icons indicating measurement mode‚ range‚ and battery status․ The selector dial is used to choose the desired measurement function – voltage‚ current‚ resistance‚ continuity‚ diode test‚ etc․ Function buttons access additional features like Auto Volt‚ Min/Max/Average recording‚ and Hold․

The input terminals accept test leads for connecting to the circuit under test; Familiarize yourself with the location of each control and its corresponding function for efficient operation․ Refer to the diagram within the manual for a detailed illustration of the display and controls․

Measurement Functions

The Fluke 179 accurately measures AC/DC voltage and current‚ resistance‚ and performs continuity and diode tests‚ offering versatile troubleshooting capabilities․

Voltage Measurement (AC/DC)

The Fluke 179 excels in both AC and DC voltage measurements‚ crucial for diverse electrical applications․ To measure DC voltage‚ select the DC voltage range using the rotary dial‚ connect the black test lead to the common terminal and the red lead to the voltage measurement terminal․ Apply the leads across the circuit or component under test‚ and the DC voltage will be displayed․

For AC voltage measurements‚ select the appropriate AC voltage range․ Connect the test leads as described for DC voltage․ The Fluke 179 automatically detects and displays the AC voltage․ Always observe proper safety precautions when measuring voltage‚ especially in high-voltage environments․ Ensure the meter is set to the correct range for accurate readings and to prevent damage to the instrument․

Current Measurement (AC/DC)

The Fluke 179 accurately measures both AC and DC current‚ essential for analyzing electrical circuits․ Important: Current measurement requires breaking the circuit to insert the meter in series․ For DC current‚ select the DC current range‚ move the red test lead to the current measurement terminal‚ and connect the black lead to the common terminal․ Connect the meter in series with the load․

To measure AC current‚ select the AC current range and follow the same series connection procedure․ The Fluke 179 will display the current value․ Caution: Exceeding the current range can damage the meter and blow the internal fuse․ Always start with the highest range and work down for optimal accuracy and safety․

Resistance Measurement

The Fluke 179 measures resistance in ohms (Ω)‚ kilohms (kΩ)‚ and megohms (MΩ)․ Crucially‚ isolate the resistor or circuit being tested – power must be OFF․ Select the resistance measurement range on the rotary dial․ Connect the test leads to the resistor; polarity doesn’t matter for resistance․ The display will show the resistance value․

For accurate readings‚ especially with low resistances‚ zero the meter using the relative mode to compensate for lead resistance․ Higher resistance measurements may take longer to stabilize․ Note: Body resistance can affect readings‚ so avoid touching the metal parts of the test leads during measurement․ Always begin with a higher range and decrease it for better resolution․

Continuity Testing

The Fluke 179’s continuity function quickly checks for complete electrical paths․ Select the continuity mode (often symbolized by a diode or sound wave) on the rotary dial․ Connect the test leads to the two points you want to test․ If a complete circuit exists – meaning very low resistance – the meter will beep audibly and often display a low resistance value․

Important: Ensure the circuit is de-energized before testing continuity․ This function is ideal for checking fuses‚ wires‚ and switch contacts․ A lack of a beep indicates an open circuit or high resistance․ Remember to disable the audible beep if working in a quiet environment․ Always verify the circuit is safe before applying power after a continuity test․

Diode Test

The Fluke 179’s diode test function assesses the functionality of diodes and other semiconductor devices․ Select the diode test mode (typically indicated by a diode symbol) using the rotary dial․ Connect the red test lead to the anode (positive side) and the black lead to the cathode (negative side) of the diode․ A healthy diode will display a forward voltage drop‚ usually between 0․5V and 0․8V․

Reverse biasing – switching the leads – should show “OL” (Over Limit) or a very high resistance‚ indicating the diode is blocking current․ A reading of 0V in both directions suggests a shorted diode‚ while “OL” in both directions indicates an open diode․ This test helps identify faulty semiconductor components within a circuit․

Advanced Features

The Fluke 179 offers Auto Volt‚ Min/Max/Average recording‚ a Hold function‚ and Relative Mode for enhanced measurement capabilities and data analysis precision․

Auto Volt Function

The Auto Volt function on the Fluke 179 is a remarkably convenient feature designed to automatically select the appropriate voltage measurement range․ This eliminates the need for manual range selection‚ saving time and reducing the potential for user error‚ especially when dealing with unknown voltage levels․

When activated‚ the meter intelligently assesses the input signal and adjusts its settings accordingly‚ ensuring accurate readings across both AC and DC voltage measurements․ This is particularly useful for technicians working in dynamic environments where voltage fluctuations are common․ The Auto Volt function enhances efficiency and provides reliable results‚ making the Fluke 179 a versatile tool for a wide range of electrical troubleshooting and maintenance tasks․

Min/Max/Average Recording

The Min/Max/Average recording capability of the Fluke 179 is a powerful diagnostic tool‚ allowing users to capture and analyze fluctuating measurements over time․ This feature automatically records the minimum and maximum values encountered during a specified period‚ alongside the average reading‚ providing a comprehensive overview of signal behavior․

This is invaluable for identifying intermittent issues‚ voltage drops‚ or transient spikes that might be missed with a single reading․ By enabling this function‚ technicians can gain deeper insights into circuit performance and pinpoint potential problems more effectively․ The recorded values are readily accessible on the display‚ facilitating quick analysis and informed decision-making during troubleshooting and maintenance procedures․

Hold Function

The Hold function on the Fluke 179 is designed for convenient measurement capture in situations where direct reading is difficult or impossible․ Activating this feature freezes the current displayed value‚ allowing the user to remove the test leads and examine the reading at their leisure‚ even from a distance․

This is particularly useful when working in poorly lit environments‚ accessing hard-to-reach test points‚ or when needing to record measurements without a second person present․ The held value remains displayed until another measurement is taken or the Hold function is manually deactivated‚ ensuring accurate and reliable data capture․ It simplifies the process of documenting readings and facilitates efficient troubleshooting․

Relative Mode

Relative mode‚ a powerful feature on the Fluke 179‚ allows users to establish a new zero point for measurements․ This is incredibly useful for isolating changes in a circuit or component‚ effectively nullifying the initial reading․ By pressing the REL button‚ the current displayed value becomes the baseline‚ and subsequent measurements are shown as deviations from that baseline․

This function is particularly valuable when measuring resistance‚ capacitance‚ or frequency‚ where absolute values are less important than changes․ It simplifies troubleshooting by highlighting differences and helps identify intermittent connections or component drift․ Relative mode enhances diagnostic capabilities and provides a more focused measurement experience․

Safety Considerations

Always prioritize safety when using the Fluke 179․ Adhere to CAT III 600V ratings‚ use proper test leads‚ and understand electrical safety precautions․

General Safety Precautions

Before using the Fluke 179‚ carefully review all safety information and instructions․ Never operate the meter with damaged test leads or probes; replace them immediately․ Avoid working in wet or damp environments‚ as this increases the risk of electric shock․ Always disconnect the meter from any circuit before changing batteries or fuses․

Ensure your hands and the meter are dry when making measurements․ Do not exceed the meter’s specified input limits․ Be cautious when working with high voltages‚ and always follow established safety procedures․ Never attempt to measure voltages or currents that are beyond the meter’s CAT rating․ Regularly inspect the meter for any signs of damage or wear‚ and discontinue use if any issues are found․ Prioritize personal protective equipment (PPE) when necessary․

CAT III 600V Safety Rating Explained

The Fluke 179’s CAT III 600V safety rating signifies its ability to withstand transient overvoltages found in building installations‚ such as those in distribution panels․ This category protects against disturbances in low-voltage AC power circuits‚ commonly found in homes and light industrial settings․ It’s crucial to understand that CAT III is not suitable for higher-risk environments like industrial power systems (CAT IV)․

This rating ensures the meter can safely measure voltages up to 600V RMS in these specified environments․ Exceeding this rating or using the meter in a higher CAT environment compromises safety․ Always verify the measurement category of the circuit before connecting the meter‚ and use appropriately rated test leads․ Proper adherence to CAT ratings is vital for preventing electrical hazards․

Proper Use of Test Leads

Always inspect test leads for any damage – cracks‚ breaks in insulation‚ or bent connectors – before each use․ Damaged leads compromise safety and measurement accuracy․ Ensure the lead connectors are clean and securely inserted into the meter and the circuit under test; Use only test leads rated for the appropriate CAT III 600V category‚ matching the meter’s rating․

When making measurements‚ maintain a firm grip on the test leads‚ avoiding contact with conductive parts of the circuit․ Never touch the metal probes while the circuit is energized․ Proper lead placement is crucial; avoid creating short circuits․ Regularly check lead resistance‚ as it can affect readings‚ especially in low-voltage measurements․

Troubleshooting Common Issues

Addressing display errors‚ lead connection problems‚ or a meter that won’t power on is crucial for continued functionality․ This section provides solutions for typical issues․

Display Errors and Solutions

Encountering display errors on your Fluke 179 can indicate various issues‚ ranging from simple low battery warnings to more complex internal problems․ A common error involves displaying “OL” or “Overload‚” signifying the measured value exceeds the meter’s range; switch to a higher range setting․

If the display appears dim or shows segments missing‚ first check the battery level and replace if necessary․ A completely blank display often points to a dead battery or‚ less commonly‚ an internal fault requiring professional service․

Error codes‚ if present‚ should be referenced in the full Fluke 179 documentation for specific troubleshooting steps․ Ensure test leads are securely connected‚ as loose connections can sometimes cause erratic readings or error messages․ If problems persist‚ consult Fluke’s support resources․

Lead Connection Problems

Experiencing issues with lead connections is a frequent concern for Fluke 179 users․ A common problem is poor contact‚ resulting in unstable or inaccurate readings․ Ensure the test leads are firmly inserted into the correct input jacks – COM‚ VΩmA‚ and 10A․ Inspect the lead tips for damage‚ corrosion‚ or bending‚ as these can impede conductivity․

If the meter displays “OL” or erratic values‚ even with a known good signal‚ suspect a lead connection issue․ Try wiggling the leads gently while observing the display; any fluctuation indicates a loose connection․ Replace damaged leads immediately․

Always use Fluke-approved test leads for optimal performance and safety․ Avoid using leads with exposed metal or cracked insulation․

Meter Not Powering On

If your Fluke 179 fails to power on‚ begin by checking the battery․ Even seemingly new batteries can be faulty․ Replace them with fresh‚ high-quality 9V alkaline batteries‚ ensuring correct polarity․ A low battery is the most common cause of this issue․

Inspect the battery compartment for corrosion or debris that might be preventing a good connection․ Clean the contacts with a cotton swab and isopropyl alcohol if necessary․ If the problem persists after a battery change‚ there might be an internal issue․

Do not attempt to disassemble the meter yourself; contact Fluke support for assistance․ Tampering with the internal components voids the warranty․

Maintenance and Care

Regular cleaning with a damp cloth ensures optimal performance․ Store the Fluke 179 in a dry place‚ and calibrate it periodically to maintain accuracy․

Cleaning the Fluke 179

To ensure the longevity and accuracy of your Fluke 179 digital multimeter‚ regular cleaning is essential․ Always disconnect the test leads and power source before commencing any cleaning procedures․ Use a soft‚ damp cloth – avoid abrasive cleaners or solvents‚ as these can damage the instrument’s casing and potentially affect internal components․

For stubborn dirt or grime‚ a mild soap solution can be applied to the cloth‚ but ensure no liquid enters the meter’s internal areas․ Pay particular attention to cleaning the display window and the input terminals․ After cleaning‚ thoroughly dry the meter with a clean‚ lint-free cloth․ Avoid storing the Fluke 179 in excessively dusty or humid environments‚ as this can contribute to corrosion and inaccurate readings․ Proper cleaning contributes significantly to reliable performance․

Storage Guidelines

Proper storage is crucial for maintaining the Fluke 179’s accuracy and extending its lifespan․ When not in use‚ store the meter in a clean‚ dry environment‚ protected from extreme temperatures and humidity․ Avoid direct sunlight exposure‚ which can damage the display and plastic components․ Ideally‚ store the meter in its original carrying case or a similar protective container․

Remove the batteries if the meter will be stored for an extended period to prevent potential corrosion from battery leakage․ Keep the test leads neatly coiled and stored separately to avoid damage to the connectors․ Do not store the Fluke 179 with other equipment that may produce corrosive fumes or vibrations․ Following these guidelines ensures your meter remains in optimal condition for years of reliable service․

Calibration Information

Maintaining the Fluke 179’s accuracy requires periodic calibration․ Calibration ensures the meter’s measurements align with traceable standards․ Fluke recommends annual calibration‚ or more frequently if the meter is used in critical applications or experiences harsh conditions․ Calibration should be performed by a qualified technician using calibrated standards․

Fluke offers calibration services‚ or you can utilize an accredited third-party calibration laboratory․ Do not attempt to calibrate the meter yourself unless you possess the necessary expertise and equipment․ Calibration involves adjusting internal components to ensure accurate readings across all measurement ranges․ A calibration sticker will be affixed to the meter indicating the date of calibration and the technician’s signature‚ providing a record of its accuracy․

Fluke Corporation and Support

Fluke is a global leader in test tools and software‚ providing reliable solutions for professionals․ Contact their support for assistance and explore warranty details․

Contacting Fluke Support

Fluke Corporation offers multiple avenues for customer support‚ ensuring users can readily access assistance with their Fluke 179 digital multimeter․ For immediate help‚ visit the official Fluke website – fluke․com – where a comprehensive knowledge base‚ FAQs‚ and troubleshooting guides are available 24/7․

Users can also connect with Fluke’s technical support team via phone․ Regional contact numbers are listed on their website‚ allowing for direct communication with a specialist․ Additionally‚ Fluke provides support through online chat‚ offering real-time assistance for urgent issues․

The website also features a dedicated support portal where users can submit support requests and track their progress․ Fluke actively engages with its community through online forums‚ providing a platform for users to share experiences and solutions․ Remember to have your meter’s serial number ready when contacting support for efficient service․

Warranty Information

Fluke Corporation stands behind the quality of the Fluke 179 with a limited lifetime warranty‚ demonstrating their commitment to customer satisfaction․ This warranty covers defects in materials and workmanship for the lifetime of the product‚ offering peace of mind to users․ However‚ it’s crucial to register your Fluke 179 within 30 days of purchase to activate the full warranty benefits․

The warranty does not cover damage resulting from misuse‚ neglect‚ accidents‚ unauthorized modifications‚ or normal wear and tear․ Fluke will‚ at its option‚ repair or replace the defective instrument free of charge․ To initiate a warranty claim‚ contact Fluke support with proof of purchase and a detailed description of the issue․

Shipping costs to Fluke are the responsibility of the customer․ Detailed warranty terms and conditions are available on the Fluke website (fluke․com) and in the documentation included with your meter․

automatic vs manual watch

Automatic and manual watches differ in how they are powered. Automatic watches use a rotor to wind the mainspring, while manual watches require daily winding by the wearer. Both offer unique advantages, with manual watches often appealing to those who value tradition and craftsmanship, and automatic watches providing convenience and modern engineering. Understanding their differences helps in choosing the right timepiece for personal preferences and lifestyle needs.

Overview of Watch Movements

Watch movements are the heart of timepieces, determining how they operate. Manual watches require the wearer to wind the mainspring daily, fostering a direct connection with the watch. This process involves turning the crown to store energy, which powers the movement. Automatic watches, however, use a rotor that winds the mainspring through wrist motion, eliminating the need for manual winding. Both movements are mechanical but differ in energy sourcing. Manual movements are often thinner due to the absence of a rotor, while automatic movements are thicker but more convenient. Understanding these movements helps enthusiasts appreciate the craftsmanship and functionality behind their timepieces.

Importance of Understanding the Differences

Understanding the differences between automatic and manual watches is crucial for making informed decisions. Manual watches appeal to those who value tradition and the tactile experience of winding, while automatic watches offer convenience for everyday wear. Knowing these distinctions helps in selecting a timepiece that aligns with personal preferences, lifestyle, and maintenance habits. Additionally, this knowledge enhances appreciation for the craftsmanship and engineering behind each type. Whether prioritizing aesthetics, functionality, or historical significance, understanding the unique aspects of each movement ensures a more meaningful connection with the watch. This awareness also aids in proper care and maintenance, extending the longevity of the timepiece.

History and Evolution

The origins of manual watches date back to early horology, emphasizing craftsmanship and tradition. Automatic watches emerged later, revolutionizing timekeeping with self-winding technology, blending innovation with practicality.

Origins of Manual Watches

Manual watches trace their roots to the early days of horology, representing the foundation of mechanical timekeeping. These timepieces require the wearer to manually wind the mainspring daily, fostering a personal connection between the wearer and the watch. The origins of manual watches are deeply tied to craftsmanship and tradition, with each piece showcasing the artistry of watchmaking. The tactile experience of winding the watch has enduring appeal, especially for those who appreciate historical significance and the tangible bond it creates. This traditional method has persisted, offering a timeless alternative to modern innovations like automatic watches.

Development of Automatic Watches

Automatic watches, also known as self-winding watches, were developed to eliminate the need for manual winding. The first practical automatic movement was invented in the 18th century by Swiss watchmaker Abraham-Louis Perrelet. However, it wasn’t until the 20th century that automatic watches became widely popular. The rotor, a oscillating weight, harnesses kinetic energy from wrist movements to wind the mainspring, providing a convenient and reliable power source. This innovation revolutionized watchmaking, offering a practical solution for everyday wear. Automatic watches are celebrated for their modern engineering and ease of use, making them a preferred choice for many watch enthusiasts seeking hassle-free timekeeping.

Key Innovations in Watchmaking

Watchmaking has seen remarkable advancements, particularly in automatic and manual watches. The introduction of the rotor in automatic watches eliminated the need for manual winding, while thinner movements in manual watches allowed for sleeker designs. Innovations in materials, such as titanium and advanced alloys, have improved durability and comfort. Additionally, the development of anti-magnetic and water-resistant technologies has enhanced performance. Modern watchmaking also emphasizes aesthetic innovations, like skeletonized movements and intricate engravings, blending artistry with functionality. These advancements have elevated both automatic and manual watches, catering to diverse preferences and lifestyles while preserving the craftsmanship that defines horology.

Design and Mechanics

Automatic watches feature a rotor for self-winding, adding thickness, while manual watches are slimmer without it, often showcasing intricate mechanics through a display back, emphasizing craftsmanship.

Manual Watch Movement: How It Works

A manual watch movement relies on a mainspring that stores energy when wound by turning the crown. This energy powers a gear train and escapement, measuring time. The process requires daily winding, fostering a direct connection between the wearer and the watch. The mainspring unwinds slowly, transferring energy through gears to the balance wheel, which oscillates to regulate timekeeping. Manual movements are often thinner due to the absence of a rotor, allowing for sleek designs. They also highlight the craftsmanship of traditional watchmaking, offering a tangible link to horological history. This mechanical simplicity appeals to purists who appreciate the art of winding their timepiece by hand.

Automatic Watch Movement: How It Works

An automatic watch movement harnesses energy from the wearer’s wrist movements to power its mainspring. A rotor, connected to the mainspring, oscillates with every motion, winding the spring and storing energy. This energy is then transmitted through a gear train to the balance wheel, which regulates timekeeping. Unlike manual watches, automatic movements eliminate the need for daily winding, offering convenience for everyday use. The rotor’s motion ensures the watch stays powered as long as it is worn, making it ideal for those who value practicality. This self-winding mechanism combines modern engineering with traditional horology, providing a seamless blend of functionality and craftsmanship.

Key Differences in Design

The design differences between automatic and manual watches are notable. Automatic watches feature a rotor, which adds thickness to the movement, while manual watches lack this component, allowing for slimmer designs. This makes manual watches ideal for those who prefer a more elegant, low-profile timepiece. Additionally, manual watches often showcase their intricate movements through display backs, as there is no rotor obscuring the view. Automatic watches, while slightly thicker, offer the convenience of a self-winding mechanism. These design distinctions cater to different aesthetic and functional preferences, with manual watches appealing to purists who appreciate traditional craftsmanship and automatic watches suiting those who value modern engineering and practicality.

Advantages and Disadvantages

Manual watches offer slim designs and a personal connection through daily winding but require consistent maintenance. Automatic watches provide convenience and reliability but are thicker and less traditional.

Pros of Manual Watches

Manual watches offer a unique charm and practical benefits. Their slimmer design, achieved without a rotor, makes them ideal for formal occasions. The ritual of daily winding fosters a personal connection, creating a sense of ownership and tradition. Additionally, manual watches often feature intricate craftsmanship visible through display backs, appealing to enthusiasts who appreciate horological art. They are also lightweight and timeless, making them a cherished choice for collectors. Furthermore, manual watches can be more affordable than automatics, offering excellent value for those who enjoy the tactile experience of winding. Overall, manual watches blend tradition, aesthetics, and craftsmanship, making them a beloved option for many watch enthusiasts.

Cons of Manual Watches

Manual watches require daily winding, which can be inconvenient for those with busy lifestyles. Forgetting to wind the watch can result in it stopping, making it unreliable for consistent timekeeping. Additionally, manual watches typically have a shorter power reserve, often lasting only 1-3 days, meaning they need frequent attention. This dependency on manual intervention can be a drawback for individuals seeking a low-maintenance timepiece. Furthermore, the constant need to wind the watch may lead to wear and tear on the crown and movement over time. While some enjoy the ritual, others find it a hassle, making manual watches less practical for everyday use compared to automatic watches.

Pros of Automatic Watches

Automatic watches offer unparalleled convenience, as they eliminate the need for daily winding. The rotor mechanism harnesses the wearer’s movements to wind the mainspring, ensuring consistent power delivery. This self-winding feature makes automatic watches ideal for individuals with busy lifestyles, as they require minimal maintenance. Additionally, automatic watches are often seen as marvels of modern engineering, combining functionality with aesthetic appeal. They also provide a seamless user experience, as they remain accurate and reliable without manual intervention. For those who appreciate innovation and practicality, automatic watches are a superior choice, offering both style and efficiency in a single timepiece.

Cons of Automatic Watches

Automatic watches have some drawbacks that may deter certain enthusiasts. The rotor mechanism can be prone to damage if dropped or exposed to harsh conditions, leading to costly repairs. Additionally, automatic watches are generally thicker than manual watches due to the rotor, which may not appeal to those who prefer sleek, minimalist designs. If the watch is not worn regularly, it can stop running, requiring manual winding to restart. Furthermore, some users find the necessity to manually wind an automatic watch when it runs out of power to be inconvenient. These factors highlight the trade-offs between convenience and maintenance in choosing an automatic watch.

Maintenance and Care

Manual watches require consistent winding to maintain power, fostering a personal connection with the timepiece. Automatic watches need less frequent intervention but still demand regular servicing to ensure optimal performance and longevity.

Maintaining a Manual Watch

Maintaining a manual watch involves regular winding to ensure consistent timekeeping. Typically, winding should occur daily, preferably at the same time, to prevent the mainspring from fully unwinding. Over-winding should be avoided, as it can strain the mechanism. Additionally, manual watches benefit from periodic servicing by a professional to clean and lubricate internal components, ensuring longevity. Unlike automatic watches, manual timepieces do not rely on wrist movement, making them more susceptible to power reserve depletion if neglected. Proper care fosters a lasting connection between the wearer and their timepiece, preserving its functionality and aesthetic appeal for generations.

Maintaining an Automatic Watch

Maintaining an automatic watch involves regular wear to keep the mainspring wound via the rotor’s motion. If not worn for extended periods, it should be stored in a cool, dry place or placed on a watch winder to maintain power. Servicing every 4-6 years is essential to clean and lubricate the movement, ensuring optimal performance. Unlike manual watches, automatics require less direct interaction but benefit from periodic professional care. Proper maintenance extends the watch’s lifespan and preserves its accuracy and aesthetic appeal, making it a reliable companion for everyday use or special occasions.

Common Mistakes to Avoid

When caring for automatic and manual watches, several common mistakes should be avoided. Over-winding is a frequent error, as it can damage the mainspring. For automatic watches, not winding manually when necessary can lead to power reserve depletion. Neglecting regular servicing is another mistake, as it can result in poor timekeeping and mechanical issues. Improper storage, such as exposing the watch to extreme temperatures or humidity, can harm the movement; Additionally, failing to wind a manual watch daily can cause it to stop running. Avoiding these mistakes ensures the longevity and optimal performance of both automatic and manual timepieces, preserving their craftsmanship and functionality for years to come;

Practical Considerations

Practical considerations for choosing between automatic and manual watches include lifestyle, convenience, and personal preference. Manual watches suit formal events due to their slim design, while automatic watches offer everyday convenience with self-winding functionality, catering to different needs and preferences effectively.

Everyday Use of Manual Watches

Manual watches require daily winding, creating a ritualistic bond between the wearer and the timepiece. This hands-on interaction fosters a sense of connection and appreciation for craftsmanship. Their thinner design makes them ideal for formal occasions, while their mechanical simplicity appeals to purists. However, they demand consistent attention, as forgetting to wind them can halt their function. Despite this, many enthusiasts find the process rewarding, valuing the tactile experience and the satisfaction of keeping their watch accurate. For those who cherish tradition and are willing to invest time, manual watches offer a unique and intimate ownership experience that stands out in a fast-paced world.

Everyday Use of Automatic Watches

Automatic watches are designed for convenience and everyday wear. They harness the wearer’s wrist movements to wind the mainspring, eliminating the need for daily manual winding. This makes them ideal for individuals with busy lifestyles or those who prefer a hassle-free experience. Their self-winding mechanism ensures consistent accuracy and reliability. However, automatic watches may be slightly thicker due to the rotor, which can be a consideration for some users. For those who value practicality and modern engineering, automatic watches offer a seamless blend of functionality and style, making them a popular choice for both casual and formal settings.

Choosing the Right Watch for Your Lifestyle

Choosing between an automatic and manual watch depends on personal preferences, lifestyle, and practical needs. Manual watches appeal to those who appreciate tradition, craftsmanship, and the tactile experience of winding. They are ideal for collectors or individuals who value the ritual of daily interaction with their timepiece. Automatic watches, on the other hand, are perfect for everyday wear, offering convenience and reliability without the need for manual winding. Consider factors like frequency of use, desired thickness of the watch, and design aesthetics. Ultimately, the decision comes down to whether you prioritize tradition and personal connection or modern convenience and practicality in your timekeeping companion.

Automatic and manual watches each offer unique charm and functionality, catering to different preferences and lifestyles. The choice between them ultimately depends on personal taste and practical needs.

Final Thoughts on Automatic vs Manual Watches

When deciding between automatic and manual watches, consider lifestyle and personal preference. Automatic watches offer convenience, winding automatically with wrist movement, ideal for everyday wear. Manual watches, requiring daily winding, appeal to those who cherish tradition and craftsmanship. Both types are durable with proper care. Automatics are thicker due to the rotor, while manuals are slimmer. Display backs reveal different mechanics: rotors for automatics and intricate movements for manuals. Ultimately, the choice reflects individual values—whether prioritizing modern engineering or embracing timeless tradition. Each watch type fosters a unique connection, making them timeless companions for watch enthusiasts.

Recommendations for Watch Enthusiasts

For watch enthusiasts, the choice between automatic and manual watches depends on personal preferences and lifestyle. If convenience and modern engineering appeal to you, automatic watches are ideal. They require minimal maintenance and are perfect for everyday wear. On the other hand, manual watches offer a tactile experience, fostering a deeper connection with the timepiece. They are a great choice for those who appreciate tradition and craftsmanship. Consider your daily routine and how often you plan to wear the watch. Additionally, budget and brand preferences should guide your decision. Both types are excellent investments, so prioritize what resonates most with your values and style.

powerflex 755 installation manual

The PowerFlex 755 AC drives offer versatile motor control, integration ease, and high performance, designed to increase productivity across various industries. They provide application flexibility, energy efficiency, and a wide power range, making them suitable for manufacturing, food and beverage, water/wastewater, and other high-demand sectors.

1.1 Overview of PowerFlex 755 Series

The PowerFlex 755 Series is a high-performance AC drive designed for versatile motor control and seamless integration across various industrial applications. With a power range from 7.5 to 250 kW, it offers flexibility, energy efficiency, and advanced control capabilities. This series supports multiple voltage options and includes a common DC bus for energy savings. Its robust design and adaptability make it suitable for industries like manufacturing, food and beverage, water/wastewater, and automotive, ensuring reliable operation and increased productivity.

1.2 Key Features and Benefits

The PowerFlex 755 Series offers advanced motor control, high performance, and energy-saving capabilities. Its key features include a wide power range, multiple voltage options, and a common DC bus for energy efficiency. It provides seamless integration with Rockwell Automation systems, customizable control algorithms, and robust safety functions. Benefits include increased productivity, reduced energy costs, and enhanced machine uptime. The drive is designed for versatility, making it suitable for high-demand applications across various industries, ensuring reliable and efficient operation.

1.3 Target Industries and Applications

The PowerFlex 755 AC drives are ideal for various industries requiring high-performance motor control. They are widely used in manufacturing, food and beverage, water/wastewater treatment, materials handling, metals, mining, and automotive sectors. These drives are suitable for applications needing precise speed control, energy efficiency, and reliability. Their versatility makes them a preferred choice for demanding environments where productivity and operational efficiency are critical. The PowerFlex 755 Series supports a range of applications, ensuring optimal performance and adaptability to specific industry needs.

System Requirements and Compatibility

The PowerFlex 755 AC drives are compatible with a wide range of AC motors and support multiple voltage options, including 240V, 400V, and 600V systems.

2.1 Power Range and Voltage Options

The PowerFlex 755 AC drives are available in a wide power range, from 0.25 to 1500 horsepower (0.18 to 1120 kW), catering to various industrial applications. Voltage options include 240V, 400V, and 600V, ensuring compatibility with different power systems. The drives support both single-phase and three-phase AC input, offering flexibility for installation; Environmental considerations include operating temperatures up to 50°C and humidity up to 95% non-condensing. The IP20-rated enclosure provides protection against solid particles and liquids. Compliance with UL and IEC standards ensures global suitability and safety.

2.2 Motor Compatibility and Control Modes

The PowerFlex 755 drives are designed to work with a variety of AC motors, including induction and synchronous motors. They support multiple control modes, such as V/Hz control, sensorless vector control, and flux observer control, ensuring precise speed and torque regulation. These modes cater to different motor types and application requirements, providing flexibility for industrial automation. The drives also offer compatibility with permanent magnet motors, enhancing energy efficiency in demanding applications. This versatility makes them suitable for a wide range of industrial processes and machinery.

2.3 Communication and Network Integration

The PowerFlex 755 AC drives support a wide range of industrial communication protocols, including EtherNet/IP, Modbus TCP/IP, and Profinet, enabling seamless integration with modern control systems. The drives can also be equipped with optional communication modules for added flexibility. This capability allows for real-time data exchange, remote monitoring, and precise motor control. The built-in Ethernet port and compatibility with DeviceNet and ControlNet further enhance connectivity, ensuring efficient communication across industrial networks and supporting advanced automation solutions.

Pre-Installation Considerations

Ensure proper site evaluation, safety compliance, and preparation of tools and materials before installing the PowerFlex 755 drive to guarantee a smooth and safe installation process.

3.1 Site Preparation and Environmental Factors

Ensure the installation site provides a stable, clean, and dry environment for the PowerFlex 755 drive. The location should maintain a temperature range of 0°C to 55°C and humidity below 95% non-condensing. Proper ventilation is essential to prevent overheating. The drive should be mounted on a sturdy, vibration-free surface, and the area must be clear of conductive dust or corrosive substances. Ensure proximity to a reliable power supply and grounding system to meet electrical safety standards. Adhere to local environmental regulations during preparation.

3.2 Safety Precautions and Compliance

Always wear personal protective equipment, including safety glasses and insulated gloves, when handling the PowerFlex 755 drive. Ensure the power supply is disconnected before starting installation. Follow proper lockout/tagout procedures to prevent accidental startups. Adhere to local and international safety standards, such as NFPA 79, for electrical equipment installation. Properly ground the drive to prevent electric shock. Use approved components and tools to maintain compliance with safety regulations. Refer to the official manual and local codes for specific requirements to ensure a safe installation environment.

3.3 Tools and Equipment Needed

The installation of the PowerFlex 755 drive requires specific tools and equipment to ensure proper setup. Essential items include a multimeter, screwdrivers (flathead and Phillips), torque wrench, and wire strippers. For programming, an RSLogix or Studio 5000 software-compatible device is necessary. Additional tools may include a ladder or lifting equipment for mounting, network cables for communication modules, and insulated hand tools for electrical connections. Always use tools rated for the drive’s voltage and current specifications to avoid damage or injury. Proper equipment ensures a safe and efficient installation process.

Installation Steps

The installation process includes unpacking, inspecting, securely mounting the drive, connecting wiring and power supply, attaching the motor, and installing communication modules if required. Testing ensures functionality.

4.1 Unpacking and Inventory of Components

Carefully unpack the PowerFlex 755 AC drive and all accessories from the shipping container. Inspect for damage and verify the components against the packing list. Ensure the drive unit, mounting hardware, power cables, and documentation are included. Check for any signs of physical damage or tampering. Organize the components in a clean, dry workspace to ensure efficient installation. If any items are missing or damaged, contact the supplier immediately for replacement before proceeding. Proper inventory ensures a smooth installation process.

4.2 Mounting the Drive and Connecting Wiring

Mount the PowerFlex 755 AC drive on a flat, secure surface using the provided mounting hardware. Ensure the drive is installed in an upright position to maintain proper airflow and heat dissipation. Leave adequate space around the unit for cooling. Connect the input and output wiring according to the terminal labels, ensuring all connections are tight and meet torque specifications. Verify motor and power supply connections align with the drive’s ratings. Double-check all wiring before applying power to prevent electrical hazards. Proper installation ensures reliable operation and safety. Always follow the manufacturer’s wiring diagram for accuracy.

4.3 Power Supply and Motor Connections

Connect the PowerFlex 755 AC drive to a compatible power supply, ensuring the voltage and current ratings match the drive’s specifications. Disconnect the power supply before making any connections to avoid electrical shock. Wire the motor to the drive’s output terminals, following the manufacturer’s recommendations. Secure all connections with the recommended torque to prevent loose wiring. Verify that the motor and power supply connections are correctly aligned with the drive’s ratings. Proper connections are critical for safe and reliable operation. Always refer to the wiring diagram for accuracy. Ensure all connections are tight and meet safety standards. Avoid overloading the drive. Adhere to local electrical codes. Double-check all connections before energizing the system. Use appropriate gauge wires to minimize voltage drop. Ground the drive and motor properly to prevent noise and ensure safety. Keep all wires organized and secured to prevent damage. Regularly inspect connections for signs of wear or overheating. Use protective equipment when handling live circuits. Follow all safety protocols to prevent injury or equipment damage. Ensure the power supply is suitable for the drive’s power requirements. Verify the motor is compatible with the drive’s output. Use the correct cable types for high-frequency PWM outputs. Shielded cables are recommended to reduce electromagnetic interference. Proper shielding ensures reliable communication and prevents noise interference. Always follow the manufacturer’s guidelines for cable selection and installation. Secure all cables to prevent movement during operation. Label all wires clearly for future maintenance. Ensure all connections are accessible for inspection and servicing. Maintain proper clearance between wires and heat-generating components. Avoid routing wires near high-temperature areas. Use cable ties or clips to manage wires neatly. Keep the work area clean and well-ventilated during installation. Dispose of packaging materials responsibly. Follow all local and national electrical codes. Ensure compliance with industry standards for wiring practices. Use only approved tools and materials for connections. Test all connections before applying power. Monitor for any signs of malfunction during initial power-up. Address any issues promptly to prevent damage. Maintain records of connections for future reference. Plan for easy access during maintenance. Ensure all connections are weatherproof if installed in harsh environments. Use appropriate connectors and seals to protect against moisture and contaminants. Regularly inspect connections in harsh environments. Replace any damaged or corroded components immediately. Keep spare wiring and connectors on hand for repairs. Train personnel on proper connection procedures. Develop a maintenance schedule to inspect connections regularly. Use thermal imaging to detect overheating connections. Address any overheating issues promptly to prevent failure. Ensure all connections are secure and meet load requirements. Use locking connectors where applicable. Test all connections under load to ensure reliability. Monitor connections during initial operation to ensure stability. Adjust connections as needed for optimal performance. Document any adjustments for future reference. Ensure all connections comply with safety regulations. Use only certified and approved materials. Follow all safety guidelines when working with electrical systems. Ensure proper grounding to prevent electrical hazards. Test the grounding system before energizing the drive. Use a multimeter to verify all connections are secure and within specifications. Check for any short circuits or open circuits before applying power. Ensure all wires are properly insulated and rated for the application. Use color-coded wires for easy identification. Follow industry best practices for wiring and connections. Ensure all connections are neat and organized for easy troubleshooting. Label all wires and connections clearly for future reference. Keep the installation clean and tidy to prevent accidents. Ensure all connections are accessible for inspection and maintenance. Use only high-quality wires and connectors to ensure reliability. Avoid using damaged or substandard materials. Regularly inspect wires for signs of wear or damage. Replace any damaged wires promptly to prevent failures. Use protective covers or sleeves on wires exposed to moving parts. Ensure all connections are protected from mechanical stress. Use flexible cables where movement is expected. Secure all cables to prevent vibration damage. Properly route cables to avoid pinching or crushing. Use cable management systems to organize wires effectively. Ensure all connections are protected from environmental hazards. Use appropriate shielding for cables in noisy environments. Follow all manufacturer recommendations for cable installation. Ensure all connections are properly documented for future maintenance. Keep a record of all wiring and connections for reference. Train maintenance personnel on connection procedures. Develop a checklist for verifying connections during installation. Ensure all connections are tested and validated before startup. Monitor connections during initial operation to ensure reliability. Address any issues promptly to prevent downtime. Maintain a spare parts inventory for common wiring components. Plan for future upgrades or modifications when installing connections. Ensure all connections are scalable for potential system expansion. Use modular connectors for easy upgrades. Follow all safety protocols when working with live electrical systems. Ensure all connections are de-energized before performing maintenance. Use proper personal protective equipment when handling electrical components. Follow lockout/tagout procedures to ensure safety during maintenance. Ensure all connections are properly labeled and signed for easy identification. Use warning labels to indicate high-voltage areas. Ensure all connections are-insulated and protected from accidental contact. Use safety barriers or guards where necessary. Ensure all connections meet local and national electrical codes. Follow all industry standards for wiring and connections. Use only approved tools and materials for the installation. Ensure all connections are secure and meet torque specifications. Avoid over-tightening connections to prevent damage. Use the correct tools for tightening connectors. Ensure all connections are free from contaminants and debris. Clean all connectors before making connections. Use contact cleaners if necessary to ensure good conductivity. Avoid using excessive force when connecting wires. Ensure all connections are aligned properly before tightening. Use alignment guides or tools if provided. Double-check all connections for proper alignment and security. Ensure all wires are seated fully in their connectors. Verify all connections visually before applying power. Use magnification tools if necessary to inspect connections. Ensure all connections are free from defects or damage. Replace any damaged connectors or wires before use. Use high-quality connectors to ensure reliable connections. Avoid using connectors with worn-out or damaged contacts. Ensure all connectors are rated for the application’s current and voltage. Use only connectors approved by the manufacturer. Follow all manufacturer guidelines for connector installation. Ensure all connections are protected from environmental factors like moisture or dust. Use weatherproof connectors in harsh environments. Apply dielectric grease to connectors in corrosive environments. Ensure all connections are properly sealed to prevent contamination. Use gaskets or O-rings where necessary to maintain a seal. Regularly inspect connectors in harsh environments for signs of wear. Replace any damaged or corroded connectors promptly. Use protective covers or boots on connectors exposed to heavy use. Ensure all connections are labeled clearly for easy identification. Use color-coding or labels to differentiate between different wires. Follow industry standards for wire color-coding. Ensure all labels are durable and legible for the expected environment. Use high-quality labels that can withstand heat, moisture, and chemicals. Apply labels securely to prevent peeling or fading. Ensure all labels are consistent throughout the installation; Use a labeling system that is easy to understand and maintain. Train personnel on the labeling system for easy identification. Ensure all labels are updated whenever changes are made to the system. Keep a master list of all labels and their corresponding wires. Use barcode or RFID labels for easy scanning and identification. Ensure all labels comply with industry standards and regulations. Use labels that are resistant to wear and tear. Ensure all labels are visible and accessible for inspection. Avoid placing labels where they can be easily damaged. Use protective sleeves or covers on labels in harsh environments. Regularly inspect labels for clarity and accuracy. Replace any faded or damaged labels promptly. Use labels that are compatible with the environmental conditions. Ensure all labels are readable under normal operating conditions. Use contrasting colors for labels to improve readability. Ensure all labels are consistent in font size and style throughout the installation. Use large enough fonts to ensure labels are easily readable. Avoid using overly complex or confusing labels. Keep labels simple and concise for easy understanding. Use symbols or icons where appropriate to supplement text labels. Ensure all symbols are standardized and easily recognizable. Follow industry standards for labeling symbols. Use labels that are bilingual or multilingual if necessary. Ensure all labels are accurate and free from errors. Double-check all labels for spelling and grammar before application. Use labels that are resistant to

4.4 Installing Communication Modules (if applicable)

Install communication modules to enable network connectivity for the PowerFlex 755 drive. Power down the drive before starting. Select the appropriate module (e.g., Ethernet, DeviceNet, or Profibus) and align it with the drive’s communication port. Secure the module using the provided screws or clips. Configure the module settings via the drive’s control panel or software. Ensure proper firmware compatibility. Test communication by pinging the drive or checking network status. Refer to the module’s user manual for specific instructions. Verify all connections are secure and properly configured. Power up the drive and test communication functionality. Address any errors promptly. Document the configuration for future reference. Ensure the module is properly grounded and meets safety standards; Use only Rockwell Automation-approved communication modules. Follow all network security guidelines. Regularly update module firmware to maintain compatibility and security. Use a compatible cable for module connections. Label all communication ports clearly. Ensure the module is installed in a dry, cool environment. Avoid exposing modules to extreme temperatures or vibrations. Secure the module firmly to prevent movement during operation. Use protective covers for unused ports. Test communication latency and throughput after installation. Monitor module performance during initial operation. Replace any faulty modules immediately. Keep spare modules available for quick replacements. Train personnel on module installation and configuration. Develop a maintenance schedule for module inspection. Use diagnostic tools to troubleshoot communication issues. Ensure all modules are properly documented in the system’s network diagram. Use network management software to monitor module performance. Ensure all modules are configured with unique IP addresses. Use subnet masks and gateways appropriately. Enable security features to prevent unauthorized access. Regularly back up module configurations. Use redundant modules if high availability is required. Ensure all modules are compatible with the existing network infrastructure. Follow all network protocols and standards. Use quality-of-service settings to prioritize critical traffic. Ensure all modules are synchronized with the system clock. Use NTP servers for accurate timekeeping. Monitor module performance during peak loads. Address any bottlenecks or delays promptly. Ensure all modules are properly licensed and activated. Use only genuine Rockwell Automation software and firmware. Follow all software update procedures carefully. Test modules in a controlled environment before deploying them in production. Use staging servers for module configuration and testing. Ensure all modules are properly documented and approved before installation. Follow all change management processes when updating modules. Use version control for module firmware and configurations. Ensure all modules are compliant with industry standards and regulations. Use only certified and approved communication modules. Follow all safety guidelines when handling modules. Ensure proper electrostatic discharge protection during installation. Use anti-static wrist straps or mats. Handle modules by the edges to prevent damage. Avoid touching sensitive electronic components. Keep modules in their original packaging until installation. Ensure the installation area is clean and free from debris. Use proper tools for module installation. Follow all torque specifications for screws. Avoid over-tightening to prevent damage. Use the correct screwdriver type to prevent stripping screws. Ensure all screws are securely fastened but not overtightened; Verify module alignment before securing. Use alignment guides if provided. Double-check all connections before powering up. Ensure all ports are clean and free from contaminants. Use compressed air to clean ports if necessary. Avoid using liquids or chemicals that could damage the modules. Use only dry, lint-free cloths for cleaning. Inspect modules for any visible damage before installation. Replace any damaged modules immediately. Keep a record of module serial numbers and firmware versions. Use asset management software to track modules. Ensure all modules are properly integrated into the system’s inventory. Develop a plan for module upgrades and replacements. Ensure all modules are compatible with future system updates. Use modular designs to facilitate easy upgrades. Follow all manufacturer guidelines for module installation and maintenance. Ensure all modules are properly documented in the system’s technical manuals. Use clear and concise labeling for all modules and ports. Ensure all labels are consistent throughout the system. Use color-coding or other methods to differentiate between modules. Follow industry standards for labeling and documentation. Ensure all modules are easily accessible for maintenance and repairs. Use proper lifting techniques when handling modules. Ensure the work area is well-ventilated and free from hazards. Follow all safety protocols when working with electrical components. Ensure all modules are properly grounded to prevent electrical shock. Use surge protectors or uninterruptible power supplies if necessary. Ensure all modules are protected from power spikes and fluctuations. Use high-quality power supplies that meet the module’s specifications. Follow all power safety guidelines when installing modules. Ensure all modules are installed in compliance with local and national electrical codes. Use only approved tools and materials for installation. Ensure all modules are properly tested and validated before being put into service. Monitor module performance closely during the initial operational period. Address any issues promptly to prevent downtime. Maintain a record of module performance and maintenance activities. Use predictive maintenance tools to monitor module health. Ensure all modules are replaced before reaching their end-of-life. Use manufacturer-recommended replacement schedules. Keep spare modules on hand to minimize downtime during replacements. Train personnel on module replacement procedures. Develop a contingency plan for module failures. Ensure all modules are properly disposed of according to environmental regulations. Use eco-friendly disposal methods whenever possible. Ensure all modules are securely stored when not in use. Use protective cases or packaging to prevent damage during storage or transport. Label all stored modules clearly for easy identification. Keep an inventory of all modules, including their locations and statuses; Use barcodes or RFID tags for efficient tracking. Develop a system for tracking module usage and maintenance history. Ensure all modules are calibrated and configured correctly before use. Use calibration tools and software as recommended by the manufacturer. Follow all calibration procedures carefully to ensure accuracy. Verify module calibration by comparing it with known standards. Document all calibration results for future reference. Ensure all modules are functioning within specified tolerances. Address any calibration errors promptly. Use only certified calibration equipment. Follow all manufacturer guidelines for calibration and configuration. Ensure all modules are properly integrated with the system’s control logic. Use programming software to configure module settings. Test all configurations thoroughly before deploying them. Ensure all modules are compatible with the system’s control program. Use only approved software versions for module configuration. Follow all programming standards and best practices. Ensure all modules are properly documented in the system’s program. Use clear and concise comments for easy understanding. Ensure all modules are tested under various operating conditions. Monitor module performance during different load scenarios. Address any performance issues promptly. Use diagnostic tools to identify and resolve module-related problems. Ensure all modules are updated with the latest software patches and security updates. Follow all cybersecurity guidelines when configuring modules. Use strong passwords and authentication methods. Enable encryption for sensitive data transmitted by modules. Regularly audit module configurations for security vulnerabilities. Ensure all modules are compliant with industry security standards. Use only trusted and verified software sources. Follow all change management processes when updating module configurations. Use version control to track changes in module settings. Ensure all modules are properly backed up before making any changes. Use redundant systems to ensure continuity in case of module failures. Develop a disaster recovery plan that includes module replacement and reconfiguration. Ensure all modules are properly integrated with backup systems. Use failover mechanisms to minimize downtime during module failures. Ensure all modules are tested regularly for redundancy and failover functionality. Use monitoring tools to track module performance and redundancy status. Address any redundancy issues promptly to maintain system availability. Ensure all modules are properly synchronized in redundant configurations. Use heartbeat signals or other monitoring methods to ensure module health. Follow all manufacturer recommendations for redundant module installations. Use only compatible modules for redundancy to ensure seamless failover. Ensure all modules are configured identically in redundant setups. Use automated synchronization tools to maintain consistency between modules. Monitor synchronization status regularly to prevent configuration drift. Address any synchronization errors promptly. Use logging tools to track module activity and errors. Analyze logs regularly to identify potential issues before they occur. Ensure all modules are properly sized for the application’s requirements. Use modules with adequate bandwidth and processing power. Avoid overloading modules with excessive data or tasks. Ensure all modules are operating within their specified temperature ranges. Use cooling systems as needed to maintain optimal temperatures. Monitor module temperatures regularly to prevent overheating. Use thermal monitoring tools to track module health. Ensure all modules are installed in well-ventilated areas. Avoid installing modules in enclosed spaces without proper cooling. Use fans or air conditioning to maintain a stable temperature. Ensure all modules are protected from humidity and moisture. Use dehumidifiers or air dryers in humid environments. Ensure all modules are installed on stable and level surfaces. Use anti-vibration mounts if necessary to

Configuration and Setup

Configure the PowerFlex 755 drive by setting parameters, motor data, and communication settings. Use the drive’s control panel or software tools for precise setup and integration.

5.1 Initial Parameter Configuration

Begin by setting essential parameters such as motor ID, speed reference, and control mode. Use the drive’s keypad or software tools to input values. Ensure correct motor data, including ratings and torque requirements. Select the appropriate control mode (V/Hz, sensorless vector, or direct torque control). Configure safety settings and enable/disable advanced features as needed. Save all changes to ensure proper operation. Always refer to the manual for default settings and guidelines to avoid configuration errors.

5.2 Setting Up Motor Parameters

Enter motor nameplate data, such as voltage, power rating, and frequency. Select the motor control mode (V/Hz, vector, or direct torque). Adjust motor parameters like flux and torque for optimal performance. Ensure motor speed and torque limits match application requirements. Use the drive’s software to input and verify settings. Save configurations to prevent loss. Test motor operation at reduced speed to confirm accuracy. Refer to the manual for specific motor parameter guidelines to ensure compatibility and precise control. Proper setup ensures efficient motor-drive interaction and prevents operational issues.

5.3 Configuring Communication Settings

Configure communication settings by selecting the protocol (e.g., Ethernet/IP, Modbus TCP/IP, or DeviceNet). Assign the device ID, baud rate, and parity settings as required by your network. Use the drive’s software to set IP addresses and subnet masks for Ethernet-based communication. Ensure proper configuration of master/slave relationships in fieldbus systems. Verify communication parameters match the connected devices. Test communication links to confirm data transmission accuracy. Refer to the manual for specific protocol guidelines and troubleshooting tips. Proper configuration ensures seamless integration with control systems and devices.

5.4 Testing and Validation

After configuring the drive, perform thorough testing to validate functionality. Run the motor and monitor its performance under various loads. Verify that all configured parameters, including speed, torque, and communication settings, operate as expected. Use diagnostic tools to check for errors or mismatches. Ensure safety features and emergency stop functions work correctly. Review operational data and adjust settings if necessary. Document test results for future reference and ensure compliance with application requirements. Successful validation confirms the drive is ready for full operational use. Proper testing minimizes downtime and ensures reliable performance. Always follow safety protocols during testing.

Advanced Features and Customization

The PowerFlex 755 offers advanced customization options, including energy-saving modes, programmable logic, and seamless integration with Rockwell Automation systems for enhanced control and efficiency.

Appendix

6.1 Energy-Saving Features and Efficiency

The PowerFlex 755 AC drives incorporate advanced energy-saving features, optimizing motor performance and reducing energy consumption. These include adaptive flux vector control and energy-efficient algorithms that adjust motor speed based on load demand. The drives also support regenerative energy solutions, returning excess energy to the power supply. These features not only enhance operational efficiency but also contribute to environmental sustainability by lowering overall energy usage and reducing carbon footprint in industrial applications. Proper configuration ensures maximum energy savings while maintaining high performance levels.

overhead door legacy 696cd/b user manual

The Overhead Door Legacy 696CD/B is a reliable garage door opener featuring a powerful motor, CodeDodger remote control, and Homelink compatibility for seamless operation.
Designed for residential use, it ensures smooth and quiet performance, with a comprehensive manual available for installation and maintenance guidance.

1.1 Overview of the Legacy 696CD/B Model

The Legacy 696CD/B is a high-performance garage door opener designed for residential use, featuring a robust 1/2 horsepower motor. It offers both chain and belt drive options, ensuring reliable operation. With advanced safety features like the Safe-T-Beam system, it provides automatic reversal for enhanced security. Compatible with sectional garage doors, this model is known for its smooth and quiet performance. The opener is Homelink and Car2U compatible, allowing seamless integration with vehicle systems. It comes with a CodeDodger remote control, ensuring secure and convenient operation. A detailed manual is available for easy installation and maintenance.

1.2 Key Features and Benefits

The Legacy 696CD/B features a 1/2 horsepower motor with a lifetime warranty, ensuring durable and long-lasting performance. It includes a Safe-T-Beam system for enhanced safety, automatically reversing the door if an obstacle is detected. The opener is equipped with a CodeDodger remote control, offering secure and convenient operation. Homelink and Car2U compatibility allow easy integration with vehicle systems. A manual operation feature is available for emergencies. With a 5-year warranty on parts, this model provides reliability and peace of mind. Its quiet and smooth operation makes it ideal for residential use.

Safety Information and Precautions

Always follow safety guidelines to avoid accidents. The Safe-T-Beam system ensures the door reverses if an obstacle is detected. Manual operation is available for emergencies.

2.1 Important Safety Warnings

Important Safety Warnings: Always read and follow the manual carefully to ensure safe installation and operation. The Safe-T-Beam system must be installed to prevent accidents. Never attempt to modify the opener’s components or bypass safety features. Keep children away from moving parts and controls. Avoid touching the motor or gears during operation. Ensure the door is properly balanced before automation. Use the emergency release handle only in emergencies. Test the door’s reversal mechanism regularly. Failure to comply may result in injury or damage. Always unplug the opener before performing maintenance.

2.2 Safe Installation and Operation Guidelines

For safe installation, ensure the garage door is properly balanced and all components are securely fastened. Follow the manual’s step-by-step instructions to avoid errors. Always install the Safe-T-Beam system at the recommended height to detect obstacles. Use approved fasteners and ensure the opener is mounted correctly. During operation, keep the remote control out of children’s reach. Regularly inspect the door and opener for wear or damage. Test the door’s auto-reverse function after installation and monthly thereafter. If unsure about any step, consult a professional technician.

Parts Identification and Assembly Instructions

The Legacy 696CD/B includes a motor, rail, trolley, and belt/chain. Assembly involves attaching the rail to the motor, securing the trolley, and connecting the Safe-T-Beam. Follow the manual for proper alignment and safety.

3.1 Identifying Components of the Garage Door Opener

The Legacy 696CD/B garage door opener includes essential components such as the motor, rail, trolley, and belt or chain. Additionally, it features the Safe-T-Beam system, remote control, and wall control. The motor powers the operation, while the rail and trolley guide the door’s movement. The belt or chain connects the motor to the trolley, ensuring smooth operation. The Safe-T-Beam system enhances safety by detecting obstacles. The remote control and wall control provide convenient operation. Refer to the manual for detailed diagrams and descriptions of each component to ensure proper identification and assembly. Proper identification is crucial for safe and effective installation.

3.2 Assembly Instructions for Initial Setup

To assemble the Legacy 696CD/B garage door opener, begin by attaching the rail to the motor unit and securing the trolley. Next, install the Safe-T-Beam system, ensuring proper alignment and connection to the motor. Connect the belt or chain to the trolley and motor, following the manual’s tensioning guidelines. Mount the wall control and remote control receiver, ensuring all wires are securely connected. Finally, test the system to ensure smooth operation. Refer to the manual for detailed diagrams and step-by-step instructions to complete the assembly correctly and safely. Proper assembly is essential for reliable performance.

Installation Instructions

The Legacy 696CD/B installation involves mounting the motor unit, attaching the rail, and securing the trolley. Ensure the Safe-T-Beam is properly aligned and connected. Follow the manual’s step-by-step guide for precise installation, adhering to safety precautions and manufacturer guidelines to ensure proper setup and functionality.

4.1 Mounting the Garage Door Opener

Mount the motor unit securely to the ceiling using the provided hardware, ensuring it is centered above the garage door. Align the rail system carefully and attach it to the trolley. Tighten all bolts firmly but avoid over-tightening. Connect the motor to the rail, ensuring proper engagement. Double-check the alignment and stability of the system. Refer to the manual for specific torque specifications and detailed mounting instructions to ensure a safe and proper installation. Always follow safety guidelines to prevent accidents during the process;

4.2 Installing the Safe-T-Beam System

The Safe-T-Beam system must be installed to ensure the garage door opener operates safely. Mount the sensors on both sides of the garage door frame, approximately 6 inches from the floor. Ensure the sensors are aligned properly and the infrared beams are unobstructed. Connect the sensors to the motor unit according to the wiring diagram in the manual. Test the system by blocking the beam with an object to verify the door stops or reverses. Proper installation is critical to prevent accidents and ensure compliance with safety standards. Always refer to the manual for detailed instructions.

4.3 Connecting the Garage Door to the Opener

To connect the garage door to the Overhead Door Legacy 696CD/B opener, begin by attaching the center bracket to the garage door, ensuring it is securely fastened. Next, align and attach the operator arm to both the door’s center bracket and the opener’s motor unit, following the manual’s alignment instructions. Check that the door is balanced by temporarily disconnecting the opener and testing if the door remains upright. Tighten all connections firmly but avoid over-tightening. Test the door’s operation using the remote or wall button to ensure smooth movement. Verify the emergency release handle is accessible and functional, and ensure the Safe-T-Beam system is operational by testing it during door closure. Review all connections for security and consult the manual if issues arise.

Operating the Overhead Door Legacy 696CD/B

Operate the Legacy 696CD/B using the CodeDodger remote for seamless control or Homelink. Manual mode allows emergency door operation by disengaging the opener. The Safe-T-Beam system ensures obstacle detection for safety.

5.1 Daily Operation and Usage

The Overhead Door Legacy 696CD/B operates smoothly with the CodeDodger remote or wall control. Press the remote button to open or close the door. The opener features an automatic operation mode, ensuring the door moves quietly and efficiently. Indicator lights on the wall control signal the system’s status. Always ensure the Safe-T-Beam system is functioning to prevent accidents. For daily use, test the door’s balance by manually opening it halfway. Regularly check the door’s alignment and tighten loose screws for optimal performance. Refer to the manual for detailed operating guidelines to maintain safety and functionality.

5.2 Using Manual Mode for Emergencies

In case of a power outage or system failure, the Legacy 696CD/B features a manual release mechanism. Locate the emergency release cord, usually attached to the door opener. Pull the cord downward to disengage the door from the opener. This allows manual operation to open or close the door. Ensure the door is balanced before manual operation to avoid injury. After resolving the issue, reconnect the door to the opener and test the system. Always refer to the manual for specific instructions to ensure safe and proper operation during emergencies.

Programming the Remote Control and Homelink

Programming the CodeDodger remote and Homelink involves pressing the learn button, entering the factory code, and testing functionality. Follow manual instructions for secure setup.

6;1 Programming the CodeDodger Remote Control

To program the CodeDodger remote control, locate the “Learn” button on the garage door opener. Press and hold it until the LED light blinks. Enter the factory code from the manual, then press the remote button to test. The door should respond. If issues arise, ensure the battery is fresh and repeat the process. Refer to the manual for specific code entry and troubleshooting steps. This ensures secure and proper remote functionality.

6.2 Setting Up Homelink and Car2U Compatibility

To set up Homelink and Car2U compatibility with your Overhead Door Legacy 696CD/B, locate the “Learn” button on the garage door opener. Press and hold it until the LED light blinks, indicating programming mode. Consult your vehicle’s manual to activate the Homelink or Car2U system, then follow the prompts to sync it with the opener. Test the system to ensure proper functionality. For troubleshooting, refer to the garage door opener’s manual or contact Overhead Door customer support for assistance. This integration ensures seamless garage door control from your vehicle.

Troubleshooting Common Issues

The Overhead Door Legacy 696CD/B may experience issues like limited remote range or erratic operation. Check the Safe-T-Beam alignment and ensure proper battery function.

7.1 Diagnosing Common Problems

Common issues with the Legacy 696CD/B include the door not closing properly or the remote control having limited range. Start by checking the Safe-T-Beam alignment and ensuring no obstructions are present. Verify that the remote control batteries are fresh and properly installed. If the door reverses unexpectedly, inspect the sensors for dirt or misalignment. For noise issues, lubricate moving parts as outlined in the maintenance section. Always refer to the manual for detailed diagnostic steps before attempting repairs. Regular checks can prevent major malfunctions and ensure smooth operation.

7.2 Solutions for Remote Control Range Issues

If the remote control range is limited, ensure the antenna on the garage door opener is positioned correctly and unobstructed. Replace the remote control batteries with fresh ones and check for proper installation. Reprogram the remote control by following the manual’s instructions. If issues persist, relocate the opener or remote to improve signal strength. Regularly test the remote range and ensure no nearby devices are interfering with the signal frequency. Refer to the manual for detailed troubleshooting steps to restore full functionality.

7.3 Resetting the Garage Door Opener

To reset the Overhead Door Legacy 696CD/B, disconnect the power source, wait 30 seconds, and reconnect it. This process clears minor glitches. If issues persist, reprogram the remote control by following the manual’s instructions. Ensure all safety sensors are clean and properly aligned. After resetting, test the door’s operation to confirm functionality. Refer to the manual for detailed reset procedures to ensure proper system restoration and maintain optimal performance. Regular resets can help prevent recurring issues and ensure smooth operation. Always follow safety guidelines during the reset process.

Maintenance and Care

Maintain your Legacy 696CD/B with routine lubrication of moving parts, inspection of components, and replacement of worn parts. Refer to the manual for detailed care instructions.

8.1 Routine Maintenance Checks

Regular maintenance ensures optimal performance of your Legacy 696CD/B garage door opener. Inspect the chain or belt for wear and tighten if necessary. Lubricate moving parts, such as the rail and gears, every six months to reduce friction and noise. Check the Safe-T-Beam system for proper alignment and ensure all screws and bolts are secure. Replace worn or damaged parts promptly to prevent malfunctions. Refer to the manual for specific maintenance schedules and instructions. Always unplug the opener before performing any maintenance to ensure safety. Keep the area around the opener clean and clear of debris.

8.2 Lubricating Moving Parts

Lubricating moving parts of your Legacy 696CD/B garage door opener is essential for smooth operation. Apply a silicone-based lubricant to the rail, gears, and springs every 6-12 months. Avoid using grease, as it can attract dust and dirt. Wipe off any excess lubricant with a clean cloth to prevent drips. Unplug the opener before lubricating to ensure safety. Proper lubrication reduces friction, minimizes noise, and extends the lifespan of the components. Refer to the manual for specific lubrication points and recommendations to maintain optimal performance and reliability. Regular lubrication is a simple yet critical maintenance task.

8.3 Replacing Wearable Parts

Regularly inspect wearable parts like the drive belt, gears, and Safe-T-Beam sensors. Replace worn or damaged components promptly to maintain optimal performance. Use genuine Overhead Door parts for compatibility and reliability. Refer to the manual or parts diagram for guidance on identifying and replacing specific components. Lubricate new parts before installation to ensure smooth operation. If unsure, contact Overhead Door customer service or a professional technician for assistance. Replacing wearable parts extends the opener’s lifespan and prevents unexpected malfunctions, ensuring safe and efficient garage door operation. Always follow safety precautions during replacement.

Warranty Information

The Overhead Door Legacy 696CD/B includes a lifetime motor warranty and 5-year parts coverage. For model 496, the motor warranty is 5 years, with 3 years on parts. Contact Overhead Door at 1-800-929-3667 for warranty inquiries. Always refer to the manual for full details or reach out to customer service for assistance with warranty-related questions.

9.1 Warranty Coverage for Motor and Parts

The Overhead Door Legacy 696CD/B offers a lifetime warranty on the motor and a 5-year warranty on parts. For model 496, the motor warranty is 5 years, and parts are covered for 3 years. These warranties ensure long-term reliability and protection against defects in materials and workmanship. Contact Overhead Door customer service at 1-800-929-3667 for warranty inquiries or claims. Always retain your proof of purchase and refer to the manual for full warranty terms and conditions. This coverage provides peace of mind for homeowners investing in the Legacy series garage door openers.

9.2 Contacting Overhead Door Customer Service

For any inquiries, assistance, or warranty claims, contact Overhead Door customer service at 1-800-929-3667. Visit their official website at www.OverheadDoor.com for comprehensive support resources. Additionally, you can email for parts-related questions or refer to the manual for detailed contact information. The customer service team is available to address installation, operation, or maintenance concerns. Always reach out to ensure proper troubleshooting and optimal performance of your Legacy 696CD/B garage door opener. This support ensures your system operates safely and efficiently for years to come.

Customer Support and Resources

Access comprehensive support resources, including online manuals, FAQs, and live chat, at www.OverheadDoor.com. Find troubleshooting guides, replacement parts, and technical support for optimal assistance.

10.1 Contacting Overhead Door Corporation

For assistance with your Legacy 696CD/B garage door opener, contact Overhead Door Corporation at 1-800-929-3667 or visit their official website at www.OverheadDoor.com.

Customer service representatives are available to help with troubleshooting, parts inquiries, and general support. You can also reach out via email for non-urgent matters.

The website offers a wealth of resources, including downloadable manuals, troubleshooting guides, and warranty information.

Contact them Monday through Friday during business hours for prompt and reliable support.

10.2 Accessing Online Manuals and Guides

Overhead Door Corporation provides convenient access to online manuals and guides for the Legacy 696CD/B model. Visit their official website at www.OverheadDoor.com to download the free PDF manual.

This comprehensive guide includes detailed installation instructions, operation tips, troubleshooting solutions, and maintenance advice.

Additional resources, such as parts diagrams and programming instructions, are also available for easy access.

This ensures users can resolve issues and maintain their garage door opener efficiently.

The Overhead Door Legacy 696CD/B garage door opener offers reliable performance, quiet operation, and advanced features like CodeDodger remote control and Safe-T-Beam technology.

With a comprehensive warranty and dedicated customer support, users can enjoy long-term satisfaction and security.

For any questions or maintenance needs, refer to the manual or contact Overhead Door Corporation at 1-800-929-3667.

This concludes the guide; we hope it helps you maximize the benefits of your Legacy 696CD/B garage door opener.

honeywell jade controller manual

The Honeywell Jade Controller Manual provides detailed information on installation and operation of Jade W7220 controller with LCD and keypad for easy navigation․

Overview of the Jade Economizer Module

The Jade Economizer Module is a key component of the Honeywell Jade Controller system, providing an expandable economizer control solution․ This module includes a W7220 controller with an LCD and keypad, allowing for easy navigation and setup․ The Jade Economizer Module is designed to optimize energy consumption and zone comfort, making it an efficient solution for various applications․ With its advanced features and user-friendly interface, the Jade Economizer Module is a reliable choice for controlling and managing HVAC systems, providing a high level of performance and efficiency, and meeting specific needs and requirements of different users and systems․

Installation Instructions for Jade W7220 Controller

Follow the manual for proper installation of Jade W7220 controller with ease and accuracy always․

Step-by-Step Guide for Replacing Older Controllers

The process of replacing older controllers with the Jade W7220 involves several key steps, including removing wires from the old controller and installing the new one, then programming the Jade W7220 controller according to the provided instructions, this guide is available on the customer website, it is recommended to follow the instructions carefully to ensure a successful replacement and proper functioning of the new controller, the guide provides detailed information on the replacement process, making it easier to complete the task, the replacement process is straightforward and can be completed with ease․

Product Information and Resources

Product data sheets and manuals are available on customer website for download instantly always․

Accessing Detailed Product Information

To access detailed product information, users can visit the customer website and download the product data sheet or manual for the Jade controller․ The website provides a range of resources, including product specifications, installation guides, and troubleshooting tips․ Users can also scan a QR code located on the product to access the relevant information․ Additionally, the website offers a search function to help users quickly find the information they need․ By providing easy access to detailed product information, Honeywell aims to support users in getting the most out of their Jade controller․ This helps to ensure safe and effective operation․

Controller Setup and Programming

Program the Jade W7220 controller per instructions to follow for proper setup and operation of the system easily and quickly always online․

Summarized Controller Setup Instructions

The summarized controller setup instructions are provided in a table for easy reference, outlining the necessary steps for setup and operation;
The instructions include powering the unit controller and programming the Jade W7220 controller according to the provided guidelines․
The table provides a concise overview of the setup process, making it easier to navigate and complete the setup quickly and efficiently, with all necessary information readily available online․

The setup instructions are designed to be user-friendly, allowing for a smooth and straightforward setup process, with minimal technical expertise required to complete the task successfully and effectively․

Economizer System Components

System components include roof curbs and weatherproofed openings for HVAC airflow management and noise reduction purposes always․

Roof Curbs and Weatherproofed Openings

Road curbs support equipment and provide weatherproofed openings for HVAC airflow, minimizing noise transfer to the space below the roof top equipment always․
These curbs suspend the load on vibration isolating springs and optional neoprene pads for added noise reduction and stability purposes․
The roof curbs are designed to work seamlessly with the Honeywell Jade controller, ensuring optimal performance and energy efficiency in various applications․
Proper installation and maintenance of roof curbs and weatherproofed openings are crucial to ensure the overall system functions as intended, providing a comfortable and healthy environment․
The curbs and openings must be carefully selected and installed to meet specific requirements and standards, including noise reduction and weatherproofing․
This ensures the system operates efficiently and effectively, providing the desired outcomes and benefits, including energy savings and improved indoor air quality always․

System Optimization and Energy Efficiency

Optimizes energy consumption and zone comfort with efficient equipment cycling and control strategies always used․

Code Compliant Jade W7220 Control System

The Jade W7220 control system is designed to be code compliant, optimizing energy consumption and zone comfort by operating compressors when outdoor-air conditions are favorable, reducing the need for mechanical cooling and heating, and providing a cost-effective solution for building owners and operators, while also meeting relevant building codes and regulations, ensuring a safe and efficient operation of the system, with features such as automatic control and monitoring, making it a reliable choice for commercial and industrial applications, with a focus on energy efficiency and sustainability, and providing a high level of control and flexibility․

Technical Specifications and Documentation

Technical specifications and documentation are available for download on customer website in PDF format for easy access always online․

Downloadable PDF Manual and Product Data Sheet

The downloadable PDF manual and product data sheet for the Honeywell Jade controller are available on the customer website․ These documents provide detailed information on the product’s features, specifications, and installation requirements․ The PDF manual is a comprehensive guide that covers all aspects of the controller’s operation and maintenance․ The product data sheet, on the other hand, provides a concise overview of the product’s technical specifications and performance characteristics․ By downloading these documents, customers can access the information they need to install, operate, and maintain their Honeywell Jade controller effectively and efficiently, ensuring optimal performance and energy efficiency always․

Warranty and Safety Information

Honeywell provides warranty and safety information for Jade controller users online always․

Warning and Disclaimer for Electrical and Mechanical Background

The information in the manual is intended for individuals with adequate electrical and mechanical backgrounds, warning users to follow safety precautions․
The manual provides a disclaimer for any damages or injuries caused by improper installation or operation of the Jade controller․
It is essential to read and understand the warning and disclaimer before proceeding with the installation or operation of the controller to ensure safe and proper use․

Additional Resources and Support

Visit customer․honeywell․com for product downloads and customer support resources available online always․

Customer Support and Product Downloads

The official Honeywell website offers a range of resources, including product manuals, data sheets, and software updates for the Jade controller․
Customer support is also available through the website, with options for contacting the support team via phone or email․
Additionally, the website provides access to a knowledge base and FAQs, where users can find answers to common questions and troubleshooting tips․
The website is a valuable resource for anyone looking to learn more about the Honeywell Jade controller or resolve any issues they may be experiencing with the product, all in one place easily․

pro thermostat manual t705

The Pro1 Technologies T705 Programmable Thermostat manual is available online, providing users with essential information and guidelines for installation and operation, visit www․pro1iaq․com for more details and support․

Overview of the T705 Thermostat

The T705 thermostat is a programmable device designed to provide users with a convenient and efficient way to control their heating and cooling systems․ The thermostat is manufactured by Pro1 Technologies, a company based in Springfield, Missouri․ According to the company’s website, the T705 thermostat is a reliable and easy-to-use device that can be installed in a variety of settings, including homes and commercial buildings․ The thermostat features a user-friendly interface and can be programmed to meet the specific needs of the user․ The device is also equipped with a low battery indicator, which alerts the user when the battery needs to be replaced․ Overall, the T705 thermostat is a versatile and practical solution for anyone looking to regulate their temperature with ease and convenience, and can be purchased and installed by following the guidelines outlined on the Pro1 Technologies website․

Specifications of the T705 Thermostat

The T705 thermostat has specific technical details and requirements for installation and operation, listed on the Pro1 Technologies website for user reference and guidance always available online․

Technical Details of the T705 Thermostat

The T705 thermostat has various technical details that are essential for its proper functioning, including power requirements, temperature range, and compatibility with different heating and cooling systems․
The user manual provides detailed information on these technical aspects, enabling users to understand the thermostat’s capabilities and limitations․
The technical details of the T705 thermostat are crucial for ensuring safe and efficient operation, and users should consult the manual to familiarize themselves with these details․
The Pro1 Technologies website also provides additional resources and support for users who need more information on the technical aspects of the T705 thermostat․
By understanding the technical details of the T705 thermostat, users can optimize its performance and enjoy a comfortable and energy-efficient environment․
The technical details are also important for troubleshooting and maintenance, allowing users to identify and resolve any issues that may arise during the thermostat’s operation․
Overall, the technical details of the T705 thermostat are a critical component of its user manual and online support resources․

Installation Tips for the T705 Thermostat

Follow the manufacturer’s instructions for proper installation of the T705 thermostat, ensuring correct wiring and mounting for optimal performance and safety, visit www․pro1iaq․com․

Thermostat Quick Reference Guide

The Pro1 Technologies T705 Programmable Thermostat quick reference guide provides users with a concise overview of the thermostat’s operation and features․ This guide is designed to help users quickly understand the thermostat’s functions and settings, allowing for easy navigation and control․ The guide includes information on the thermostat’s display screen, buttons, and menus, as well as troubleshooting tips and error messages․ By referring to the quick reference guide, users can easily resolve common issues and optimize the thermostat’s performance․ The guide is available online at www․pro1iaq․com, along with other support resources and documentation․ Users can also contact the manufacturer’s customer support team for additional assistance and guidance․ The quick reference guide is an essential resource for anyone using the T705 thermostat, providing a comprehensive and easily accessible source of information; It is recommended that users familiarize themselves with the guide to get the most out of their thermostat․

Wiring Instructions for the T705 Thermostat

Follow the manufacturer’s wiring instructions carefully to ensure safe installation of the T705 thermostat, visit www․pro1iaq․com for detailed wiring diagrams and guidelines always․

Understanding the Wiring Diagrams

The wiring diagrams for the T705 thermostat are provided in the manual to help users understand the installation process․ These diagrams show the connections between the thermostat and the heating and cooling systems․ The manual also includes a table of contents that outlines the different sections of the wiring diagrams, making it easier to navigate․ The diagrams are detailed and include information on the wiring colors and connections․ It is essential to follow the wiring diagrams carefully to ensure safe and proper installation of the thermostat․ The manufacturer’s website, www․pro1iaq․com, also provides additional resources and support for users who need help with the wiring diagrams․ By following the diagrams and instructions, users can ensure that their T705 thermostat is installed correctly and functions properly․ The wiring diagrams are an essential part of the manual and should be consulted during the installation process․

Features of the T705 Thermostat

The T705 thermostat has programmable settings and energy-saving features, visit www․pro1iaq․com for more details and user manual information online always available․

Advanced Features and Settings

The T705 thermostat offers a range of advanced features and settings, including programmable temperature control and energy-saving modes․ The user can customize the thermostat settings to suit their needs and preferences․ The thermostat also has a low battery indicator, which alerts the user when the battery power is low․ The user can replace the battery within 21 days to ensure uninterrupted operation․ The T705 thermostat is designed to provide optimal temperature control and energy efficiency, making it an ideal choice for homeowners and businesses․ The thermostat’s advanced features and settings can be accessed through the user-friendly interface, which provides clear and concise instructions for programming and operation․ The user can also refer to the online manual and support resources for more information and guidance on using the T705 thermostat’s advanced features and settings․ The thermostat’s settings can be adjusted to optimize energy consumption․

Tech Settings and Configuration

Configuring the T705 thermostat requires accessing the tech settings menu, visit www․pro1iaq․com for guidance and support on configuration and technical settings options available․

Customizing the T705 Thermostat

The T705 thermostat can be customized to meet specific user needs, with options to adjust temperature settings, scheduling, and other features․
The customization process involves accessing the thermostat’s menu and selecting the desired options․
The Pro1 Technologies website provides detailed instructions and guidance on customizing the T705 thermostat․
Users can also contact the company’s support team for assistance with customization․
The T705 thermostat’s customization capabilities allow users to optimize its performance and energy efficiency․
By customizing the thermostat, users can create a comfortable and energy-efficient environment․
The customization options are user-friendly and easy to navigate, making it simple for users to tailor the thermostat to their needs․
Overall, customizing the T705 thermostat is a straightforward process that can help users get the most out of their device․
The Pro1 Technologies T705 thermostat is designed to be flexible and adaptable, making it a great choice for users who want a customized heating and cooling experience․

Reference Materials for the T705 Thermostat

Visit www․pro1iaq․com for T705 thermostat reference materials and support resources available online always․

Additional Resources and Support

The Pro1 Technologies T705 Programmable Thermostat website offers a range of additional resources and support options for users, including a comprehensive FAQ section, user manuals, and technical specifications․
The website also provides contact information for customer support, allowing users to reach out with questions or concerns․
Furthermore, the company’s website is available in multiple languages, making it accessible to a wider range of users․
In addition to the website, Pro1 Technologies also offers phone and email support, providing users with multiple channels for seeking help․
The company’s commitment to providing excellent customer support ensures that users can get the most out of their T705 thermostat․
Overall, the combination of online resources and direct support options makes it easy for users to find the help they need․
The Pro1 Technologies website is a valuable resource for anyone looking to learn more about the T705 thermostat or seeking support with installation or operation․

fire lite es 50x manual

The Fire Lite ES 50X manual provides information on installation and operation of the addressable fire alarm control panel‚ available for download on the official website‚ with an embedded e-Manual option.

Overview of the Fire Lite ES 50X

The Fire Lite ES 50X is a cutting-edge addressable fire alarm control panel designed to provide reliable and efficient fire protection solutions. This advanced system is equipped with a range of innovative features‚ including a user-friendly interface and advanced detection capabilities. The ES 50X is part of a comprehensive line of fire alarm control panels‚ offering flexibility and scalability to meet the unique needs of various applications. With its compact design and intuitive operation‚ the ES 50X is an ideal solution for commercial‚ industrial‚ and residential settings. The system’s advanced technology and robust construction ensure optimal performance and reliability‚ making it a trusted choice for fire safety professionals. The ES 50X is designed to integrate seamlessly with other fire safety devices and systems‚ providing a comprehensive and coordinated approach to fire protection. Overall‚ the Fire Lite ES 50X is a powerful and versatile fire alarm control panel that offers exceptional performance and value.

Features of the Fire Lite ES 50X

The Fire Lite ES 50X has cost-effective and intelligent fire alarm features‚ including addressable detection and control options‚ with advanced technology and robust construction for optimal performance always guaranteed online.

Addressable Fire Alarm Control Panel

The Fire Lite ES 50X is an addressable fire alarm control panel that provides a high level of flexibility and reliability in fire detection and alarm systems.
The panel is designed to meet the needs of a wide range of applications‚ from small to large facilities‚ and is compatible with a variety of detection devices and accessories.
The addressable feature allows for precise location of detectors and manual pull stations‚ making it easier to identify the source of an alarm and respond quickly.
The control panel is also equipped with advanced features such as programmable zones‚ time-based functions‚ and remote monitoring capabilities.
The Fire Lite ES 50X addressable fire alarm control panel is a robust and reliable solution for fire safety and security needs‚ and is backed by a comprehensive manual and technical support.
The panel’s design and functionality make it an ideal choice for installations where reliability and flexibility are essential.
Overall‚ the Fire Lite ES 50X addressable fire alarm control panel is a high-quality solution for fire safety and security applications.
The manual provides detailed information on the panel’s features and operation.
The Fire Lite ES 50X is a popular choice among fire safety professionals and building owners;
It is widely used in various applications‚ including commercial and industrial facilities.
The panel’s advanced features and reliability make it a valuable asset in any fire safety system.
The Fire Lite ES 50X addressable fire alarm control panel is a critical component of a comprehensive fire safety strategy.
It provides a high level of protection and peace of mind for building occupants and owners.
The panel is designed to meet the latest fire safety standards and regulations.
It is also backed by a comprehensive warranty and technical support.
The Fire Lite ES 50X is a reliable and effective solution for fire safety needs.
It is an essential component of any fire safety system.
The panel’s features and functionality make it an ideal choice for a wide range of applications.
The Fire Lite ES 50X addressable fire alarm control panel is a high-quality solution for fire safety and security needs;
It provides a high level of protection and reliability‚ and is backed by a comprehensive manual and technical support.
The panel is widely used in various applications‚ and is a popular choice among fire safety professionals and building owners.
It is designed to meet the latest fire safety standards and regulations‚ and is also backed by a comprehensive warranty.
The Fire Lite ES 50X is a valuable asset in any fire safety system‚ and provides a high level of protection and peace of mind for building occupants and owners.
The panel’s advanced features and reliability make it a critical component of a comprehensive fire safety strategy.
It is an essential component of any fire safety system‚ and is widely used in various applications.
The Fire Lite ES 50X addressable fire alarm control panel is a reliable and effective solution for fire safety needs‚ and is backed by a comprehensive manual and technical support.

Accessing the Fire Lite ES 50X Manual

Users can access the manual through the website or embedded e-Manual option settings support open e-Manual for viewing on PC or mobile devices easily always.

Downloading the Manual from the Website

The process of downloading the Fire Lite ES 50X manual from the website is straightforward‚ allowing users to access the information they need quickly and easily. The manual is available in a downloadable format‚ making it simple to save and refer to later. By visiting the official website‚ users can navigate to the support section and find the manual‚ which is typically available in a PDF format. This allows users to view the manual on their PC or mobile device‚ making it easy to access the information they need‚ regardless of their location. The website also provides a range of other resources and support materials‚ including FAQs and troubleshooting guides‚ to help users get the most out of their Fire Lite ES 50X system. Overall‚ downloading the manual from the website is a convenient and efficient way to access the information you need.

Understanding the Fire Lite ES 50X Programming Manual

The manual provides detailed programming instructions and guidelines for proper system configuration and operation settings.

Pre-Installed Communicator and IPOTS-COM

The Fire Lite ES 50X comes with a pre-installed communicator‚ the IPOTS-COM‚ which enables remote monitoring and control of the fire alarm system. This feature allows for efficient communication between the control panel and the monitoring station. The pre-installed communicator simplifies the installation process and reduces the need for additional hardware. The IPOTS-COM is designed to work seamlessly with the ES 50X‚ ensuring reliable and secure communication. The communicator is also compatible with various protocols‚ making it a versatile solution for different applications. By having a pre-installed communicator‚ users can enjoy enhanced system functionality and improved response times in emergency situations. The IPOTS-COM is an important component of the Fire Lite ES 50X‚ and its pre-installation adds value to the overall system. Overall‚ the pre-installed communicator and IPOTS-COM make the Fire Lite ES 50X a comprehensive and advanced fire alarm solution;

Importance of Updating Software

Regular software updates ensure the Fire Lite ES 50X operates efficiently and securely‚ with new features and improvements added regularly‚ available for download on the official website‚ for optimal performance always.

Downloading the Most Current Version of Software

To ensure optimal performance and security‚ it is essential to download the most current version of software for the Fire Lite ES 50X. The official website provides access to the latest software updates‚ which can be downloaded and installed easily. By following the instructions provided on the website‚ users can quickly and efficiently update their software‚ taking advantage of new features and improvements. The website is regularly updated with new software versions‚ so it is crucial to check for updates periodically. Additionally‚ the website offers a user-friendly interface‚ making it easy to navigate and find the required software updates. By downloading the most current version of software‚ users can ensure their Fire Lite ES 50X operates efficiently and securely‚ with all the latest features and improvements. This helps to prevent any potential issues and ensures the system runs smoothly. Regular software updates are vital for maintaining the system’s integrity.

Safety Precautions for Fire Lite ES 50X

Follow basic precautions to reduce fire and electric shock risks when using Fire Lite ES 50X‚ as outlined in the manual and on the official website for user reference always.

Reducing the Risk of Fire and Electric Shock

To minimize the risk of fire and electric shock‚ it is essential to follow the safety guidelines outlined in the Fire Lite ES 50X manual‚ which provides crucial information on the proper installation‚ operation‚ and maintenance of the addressable fire alarm control panel. The manual emphasizes the importance of adhering to basic precautions‚ such as keeping the area around the control panel clear of flammable materials and ensuring that all electrical connections are secure. Additionally‚ the manual recommends regular inspections and testing of the system to ensure that it is functioning correctly and that all components are in good working condition. By following these guidelines‚ users can significantly reduce the risk of fire and electric shock‚ and ensure the safe and reliable operation of the Fire Lite ES 50X. The manual is available for download on the official website‚ providing easy access to this critical information.

on Fire Lite ES 50X Manual

The Fire Lite ES 50X manual is a comprehensive resource that provides users with the information they need to install‚ operate‚ and maintain the addressable fire alarm control panel. The manual is available in various formats‚ including a downloadable version from the official website and an embedded e-Manual option. By following the guidelines and instructions outlined in the manual‚ users can ensure the safe and reliable operation of the Fire Lite ES 50X‚ minimizing the risk of fire and electric shock. The manual is an essential tool for anyone involved in the installation‚ operation‚ or maintenance of the Fire Lite ES 50X‚ and its availability in various formats makes it easily accessible. Overall‚ the Fire Lite ES 50X manual is a valuable resource that plays a critical role in ensuring the effective and safe operation of the addressable fire alarm control panel‚ and its importance should not be overlooked. The manual is a key component of the overall system.

cessna 172n service manual

The Cessna 172N Service Manual provides essential information for maintenance and repair, including

general procedures

and guidelines for handling and servicing the aircraft properly always.

Purpose of the Manual

The purpose of the Cessna 172N Service Manual is to provide owners, operators, and maintenance personnel with a comprehensive guide for the maintenance and servicing of the aircraft. This manual contains detailed information on the procedures and guidelines for handling and servicing the aircraft, including the necessary precautions and safety measures to ensure the aircraft is airworthy. The manual is designed to be used in conjunction with the aircraft’s operating handbook and other relevant documentation. It provides a detailed overview of the aircraft’s systems and components, as well as procedures for troubleshooting and repairing common issues. The manual is an essential resource for anyone responsible for the maintenance and upkeep of the Cessna 172N, and is intended to help ensure the safe and efficient operation of the aircraft. By following the procedures and guidelines outlined in the manual, users can help extend the life of the aircraft and prevent unnecessary repairs. The manual is a valuable tool for maintaining the aircraft’s performance and reliability.

Importance of the Manual

The Cessna 172N Service Manual is a crucial document that plays a vital role in ensuring the safe and efficient operation of the aircraft. The manual provides a comprehensive guide for maintenance and servicing, which helps to prevent accidents and reduce downtime. By following the procedures and guidelines outlined in the manual, users can help extend the life of the aircraft and prevent unnecessary repairs. The manual is also essential for complying with regulatory requirements and maintaining the aircraft’s airworthiness. Additionally, the manual helps to reduce maintenance costs by providing detailed information on troubleshooting and repairing common issues. The importance of the manual cannot be overstated, as it provides a valuable resource for owners, operators, and maintenance personnel. The manual is a critical component of the aircraft’s maintenance program, and its use is essential for ensuring the safe and reliable operation of the Cessna 172N. Overall, the manual is an indispensable tool for anyone involved in the maintenance and upkeep of the aircraft.

Cessna 172N Aircraft Overview

The Cessna 172N is a single-engine aircraft with

four-seat capacity

and fixed landing gear always.

Aircraft Specifications

The Cessna 172N aircraft has a maximum takeoff weight of 2550 pounds and a maximum cruise speed of 122 knots. The aircraft is powered by a Lycoming O-320-E2D engine, which produces 180 horsepower. The Cessna 172N has a service ceiling of 13,000 feet and a range of approximately 790 nautical miles. The aircraft’s wingspan is 36 feet 1 inch and its length is 27 feet 2 inches. The Cessna 172N has a fixed tricycle landing gear and a maximum payload capacity of 810 pounds. The aircraft’s fuel capacity is 43 gallons, which provides a maximum endurance of approximately 5 hours. The Cessna 172N is equipped with a variety of standard avionics, including a navigation system, communication system, and instrument panel. The aircraft’s specifications make it an ideal choice for flight training, personal transportation, and other general aviation purposes. The Cessna 172N’s specifications are well-suited for a wide range of operating conditions, including high-density altitudes and cold temperatures. Overall, the Cessna 172N is a reliable and versatile aircraft.

Aircraft Systems

The Cessna 172N aircraft is equipped with a range of systems that work together to ensure safe and efficient operation. The electrical system includes a 12-volt battery and a 60-ampere alternator, which powers the aircraft’s avionics and electrical accessories. The fuel system consists of two 26-gallon fuel tanks, which are connected to the engine by a fuel pump and fuel lines. The aircraft’s hydraulic system is used to operate the landing gear and flaps. The Cessna 172N also has a pneumatic system, which powers the aircraft’s instruments and other accessories. The aircraft’s systems are designed to be reliable and easy to maintain, with many components being easily accessible for inspection and repair. The Cessna 172N’s systems are also well-suited for a wide range of operating conditions, including high-altitude and cold-weather operations. Overall, the Cessna 172N’s systems are an important part of its overall design and functionality. The systems work together to provide a safe and efficient flying experience. The Cessna 172N’s systems are critical to its operation and require regular maintenance.

Maintenance and Servicing

Regular maintenance is crucial for the Cessna 172N, including

inspections

and repairs to ensure safe operation always.

Regular Maintenance

The Cessna 172N service manual outlines the importance of regular maintenance to ensure the aircraft remains airworthy and safe to operate.

According to the manual, regular maintenance tasks include daily inspections, as well as scheduled maintenance at specific intervals, such as every 50 hours of flight time.

These tasks may include checking the engine oil and filter, inspecting the tires and brakes, and verifying the proper function of all aircraft systems, including the electrical, fuel, and hydraulic systems.

Additionally, the manual provides guidelines for performing routine maintenance tasks, such as cleaning and lubricating moving parts, and replacing worn or damaged components.

By following the regular maintenance schedule outlined in the service manual, owners and operators can help prevent unexpected maintenance issues and ensure the Cessna 172N remains in good working condition.

The manual also provides information on how to perform these tasks, including step-by-step instructions and illustrations to help guide the maintenance process.

Troubleshooting and Repair

The Cessna 172N service manual provides detailed troubleshooting guides to help identify and repair issues with the aircraft.

These guides include symptom-based troubleshooting procedures, as well as diagnostic tests and checks to help pinpoint the source of the problem.

The manual also includes repair procedures for common issues, such as engine problems, electrical system malfunctions, and landing gear issues.

Additionally, the manual provides information on how to replace or overhaul components, such as the engine, propeller, and avionics systems.

The troubleshooting and repair sections of the manual are organized by system, making it easy to find the information needed to address a specific issue.

By following the troubleshooting and repair procedures outlined in the service manual, owners and operators can quickly and effectively diagnose and repair problems with the Cessna 172N, minimizing downtime and getting back in the air as soon as possible, with all necessary tools and equipment.

The manual is a valuable resource for anyone responsible for maintaining and repairing the Cessna 172N aircraft, with its clear instructions and detailed illustrations.